Snowflakeでのスコアリングコードの自動デプロイと置換
本機能の提供について
デフォルトでは、Snowflakeでのスコアリングコードの自動デプロイと置換はオフです。 この機能を有効にする方法については、DataRobotの担当者または管理者にお問い合わせください。
機能フラグ:Snowflakeでのスコアリングコードの自動デプロイと置換を有効にする
DataRobotが管理するSnowflake予測環境を作成して、SnowflakeにDataRobotスコアリングコードをデプロイします。 DataRobotの管理を有効にすることで、外部のSnowflakeへのデプロイは、MLOpsによる管理(スコアリングコードの自動置換など)を利用できます。
外部モデルと監視ジョブのサービス正常性に関する情報
サービス正常性の情報は、エージェントによって監視される外部のデプロイでは入手できません。また、予測監視ジョブを介して予測がアップロードされるデプロイでも入手できません。
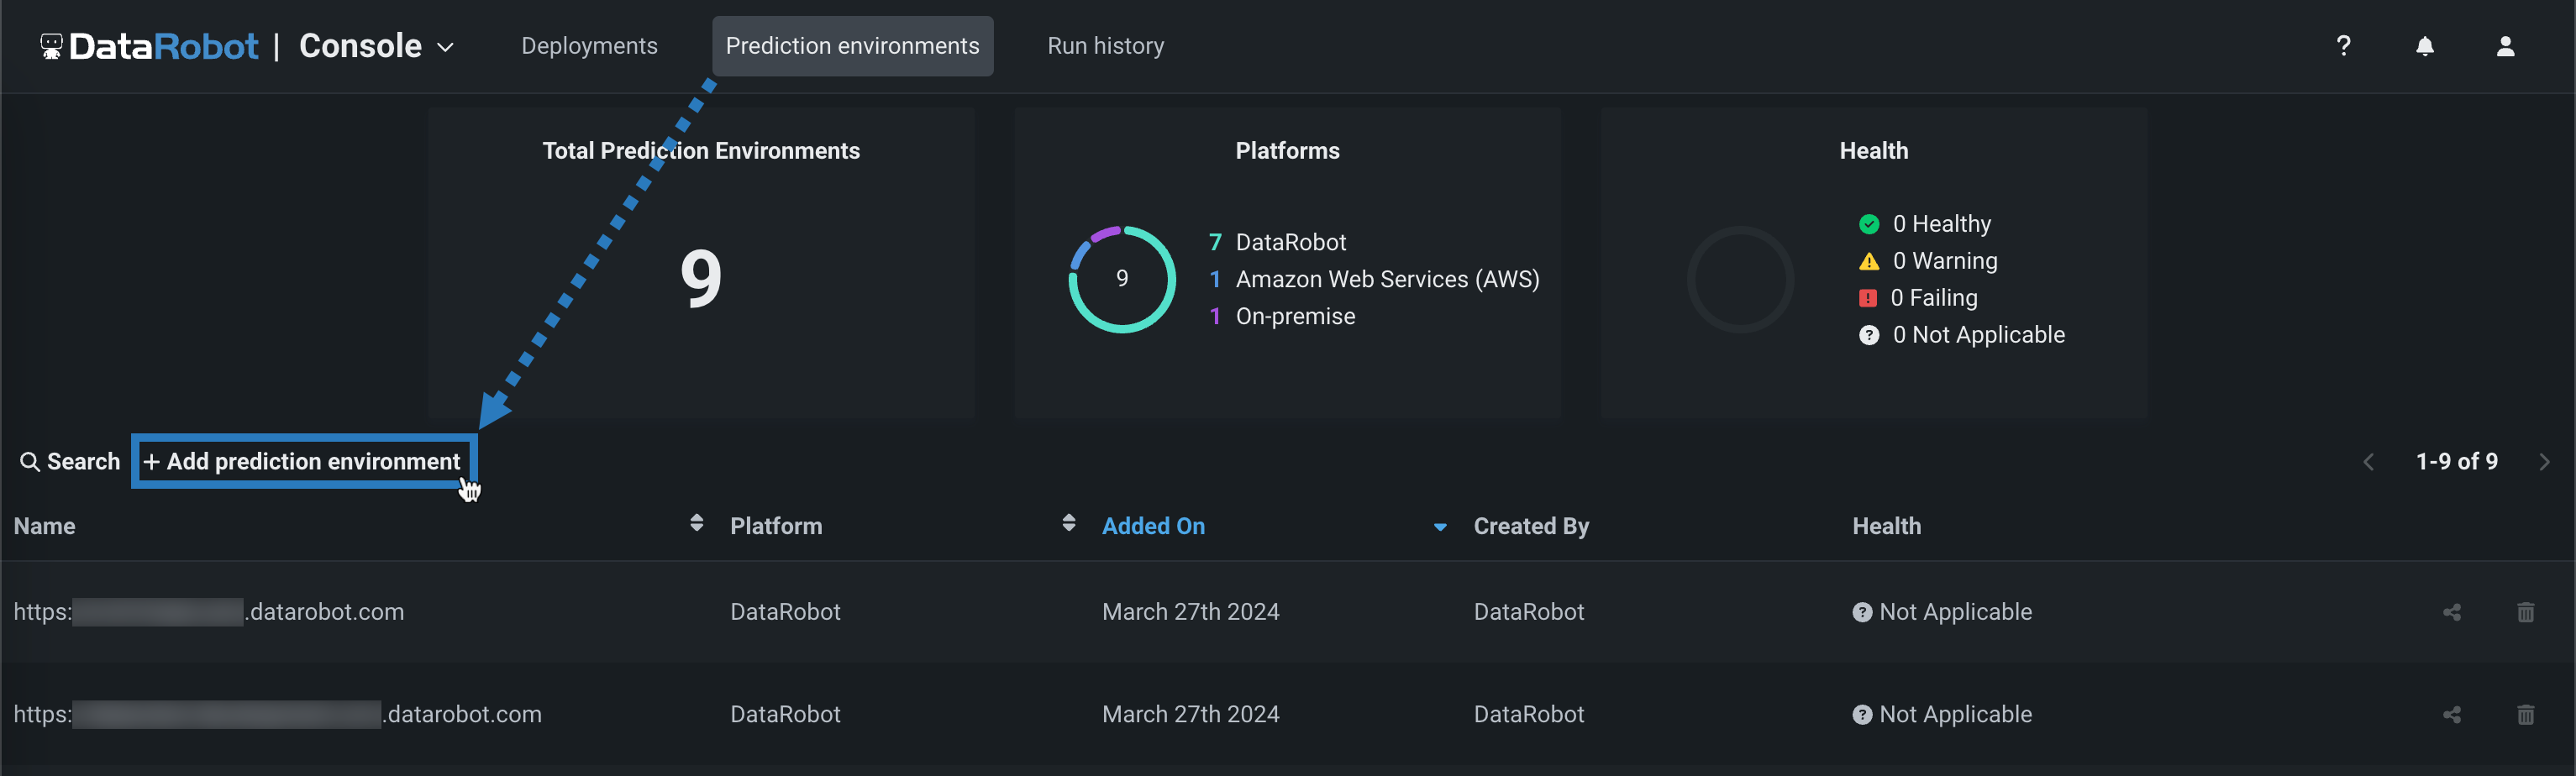
Snowflake予測環境の作成
Snowflakeにモデルをデプロイするには、まずカスタムSnowflake予測環境を作成します。
-
コンソール > 予測環境ページを開き、+ 予測環境を追加をクリックします。
-
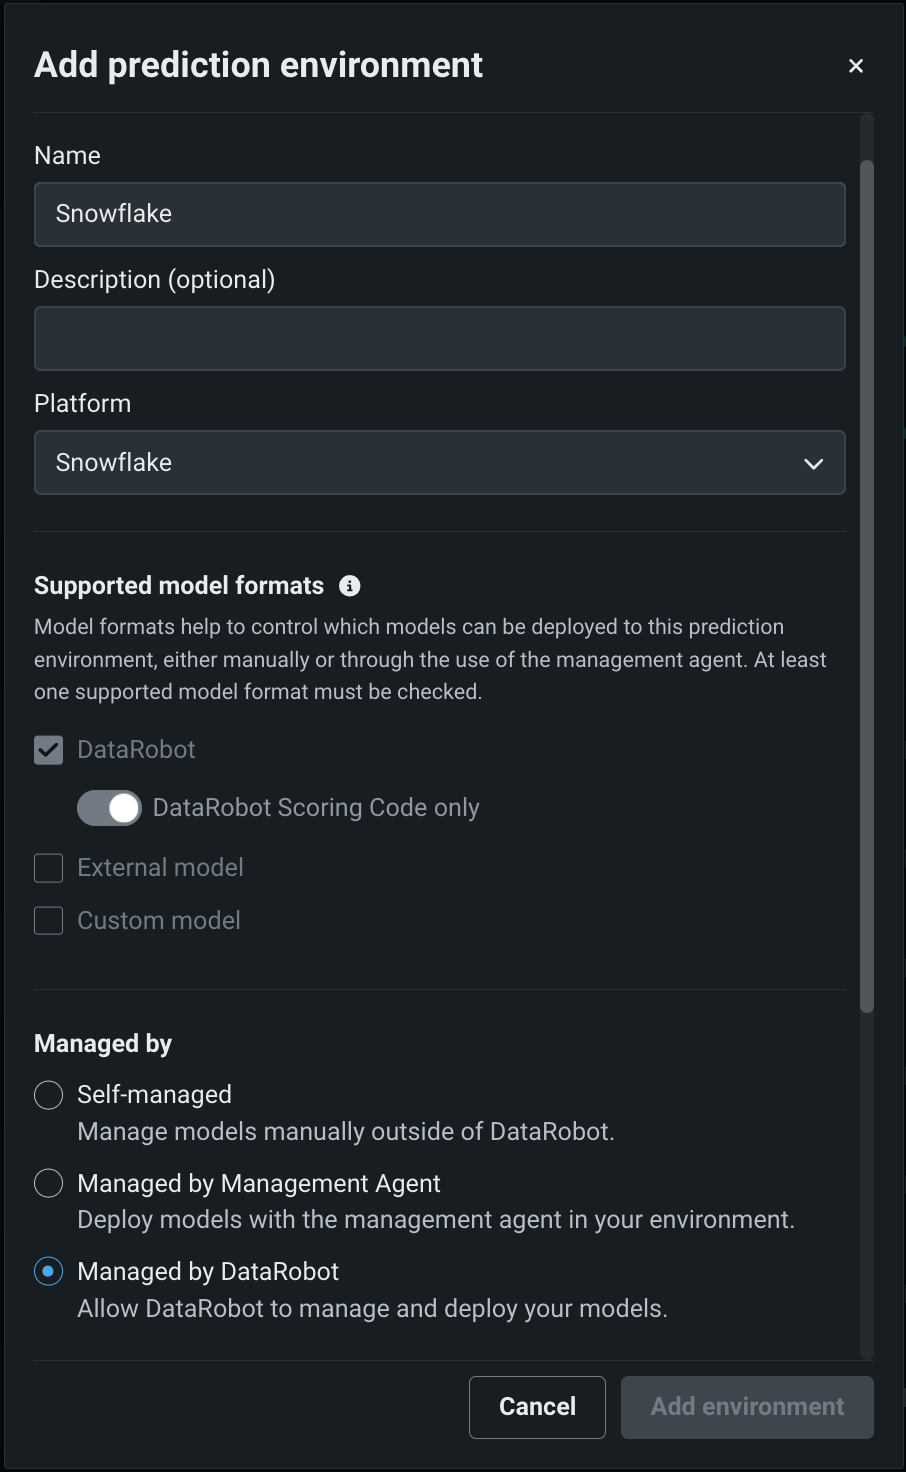
予測環境を追加ダイアログボックスで、予測環境設定を行います。
-
予測環境について、わかりやすい名前を入力し、必要に応じて説明も入力します。
-
プラットフォームドロップダウンリストからSnowflakeを選択します。
-
DataRobotが管理設定を有効にすると、この予測環境が管理エージェントを介してDataRobotスコアリングコードモデルを自動的にパッケージ化してデプロイできます。
サポートされているモデル形式設定は自動的にDataRobotスコアリングコードに設定され、これはSnowflakeでサポートされている唯一のモデル形式であるため、変更できません。
-
-
管理設定セクションで、データ接続と関連する資格情報を選択してから、Snowflakeスキーマを選択します。 Snowflakeスキーマは、Snowflakeテーブルのコレクションです。
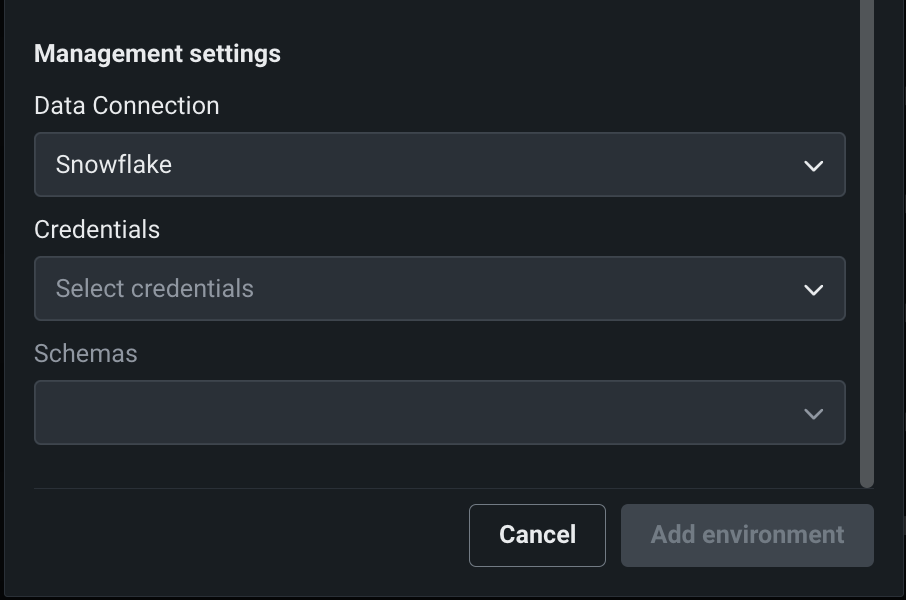
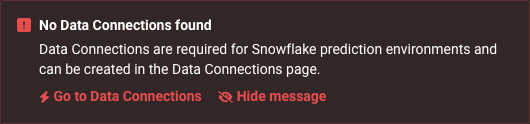
Snowflake資格情報が必要
SnowflakeでのスコアリングコードのDataRobot管理には、資格情報が保存されているSnowflakeへの既存のデータ接続が必要です。 既存のSnowflakeデータ接続がない場合は、データ接続が見つかりませんアラートが表示され、データ接続に移動して Snowflake接続を作成するよう指示されます。
-
環境設定を行った後、環境を追加をクリックします。
モデルをSnowflake予測環境にデプロイ
Snowflake予測環境を作成したら、その環境にモデルをデプロイできます。
-
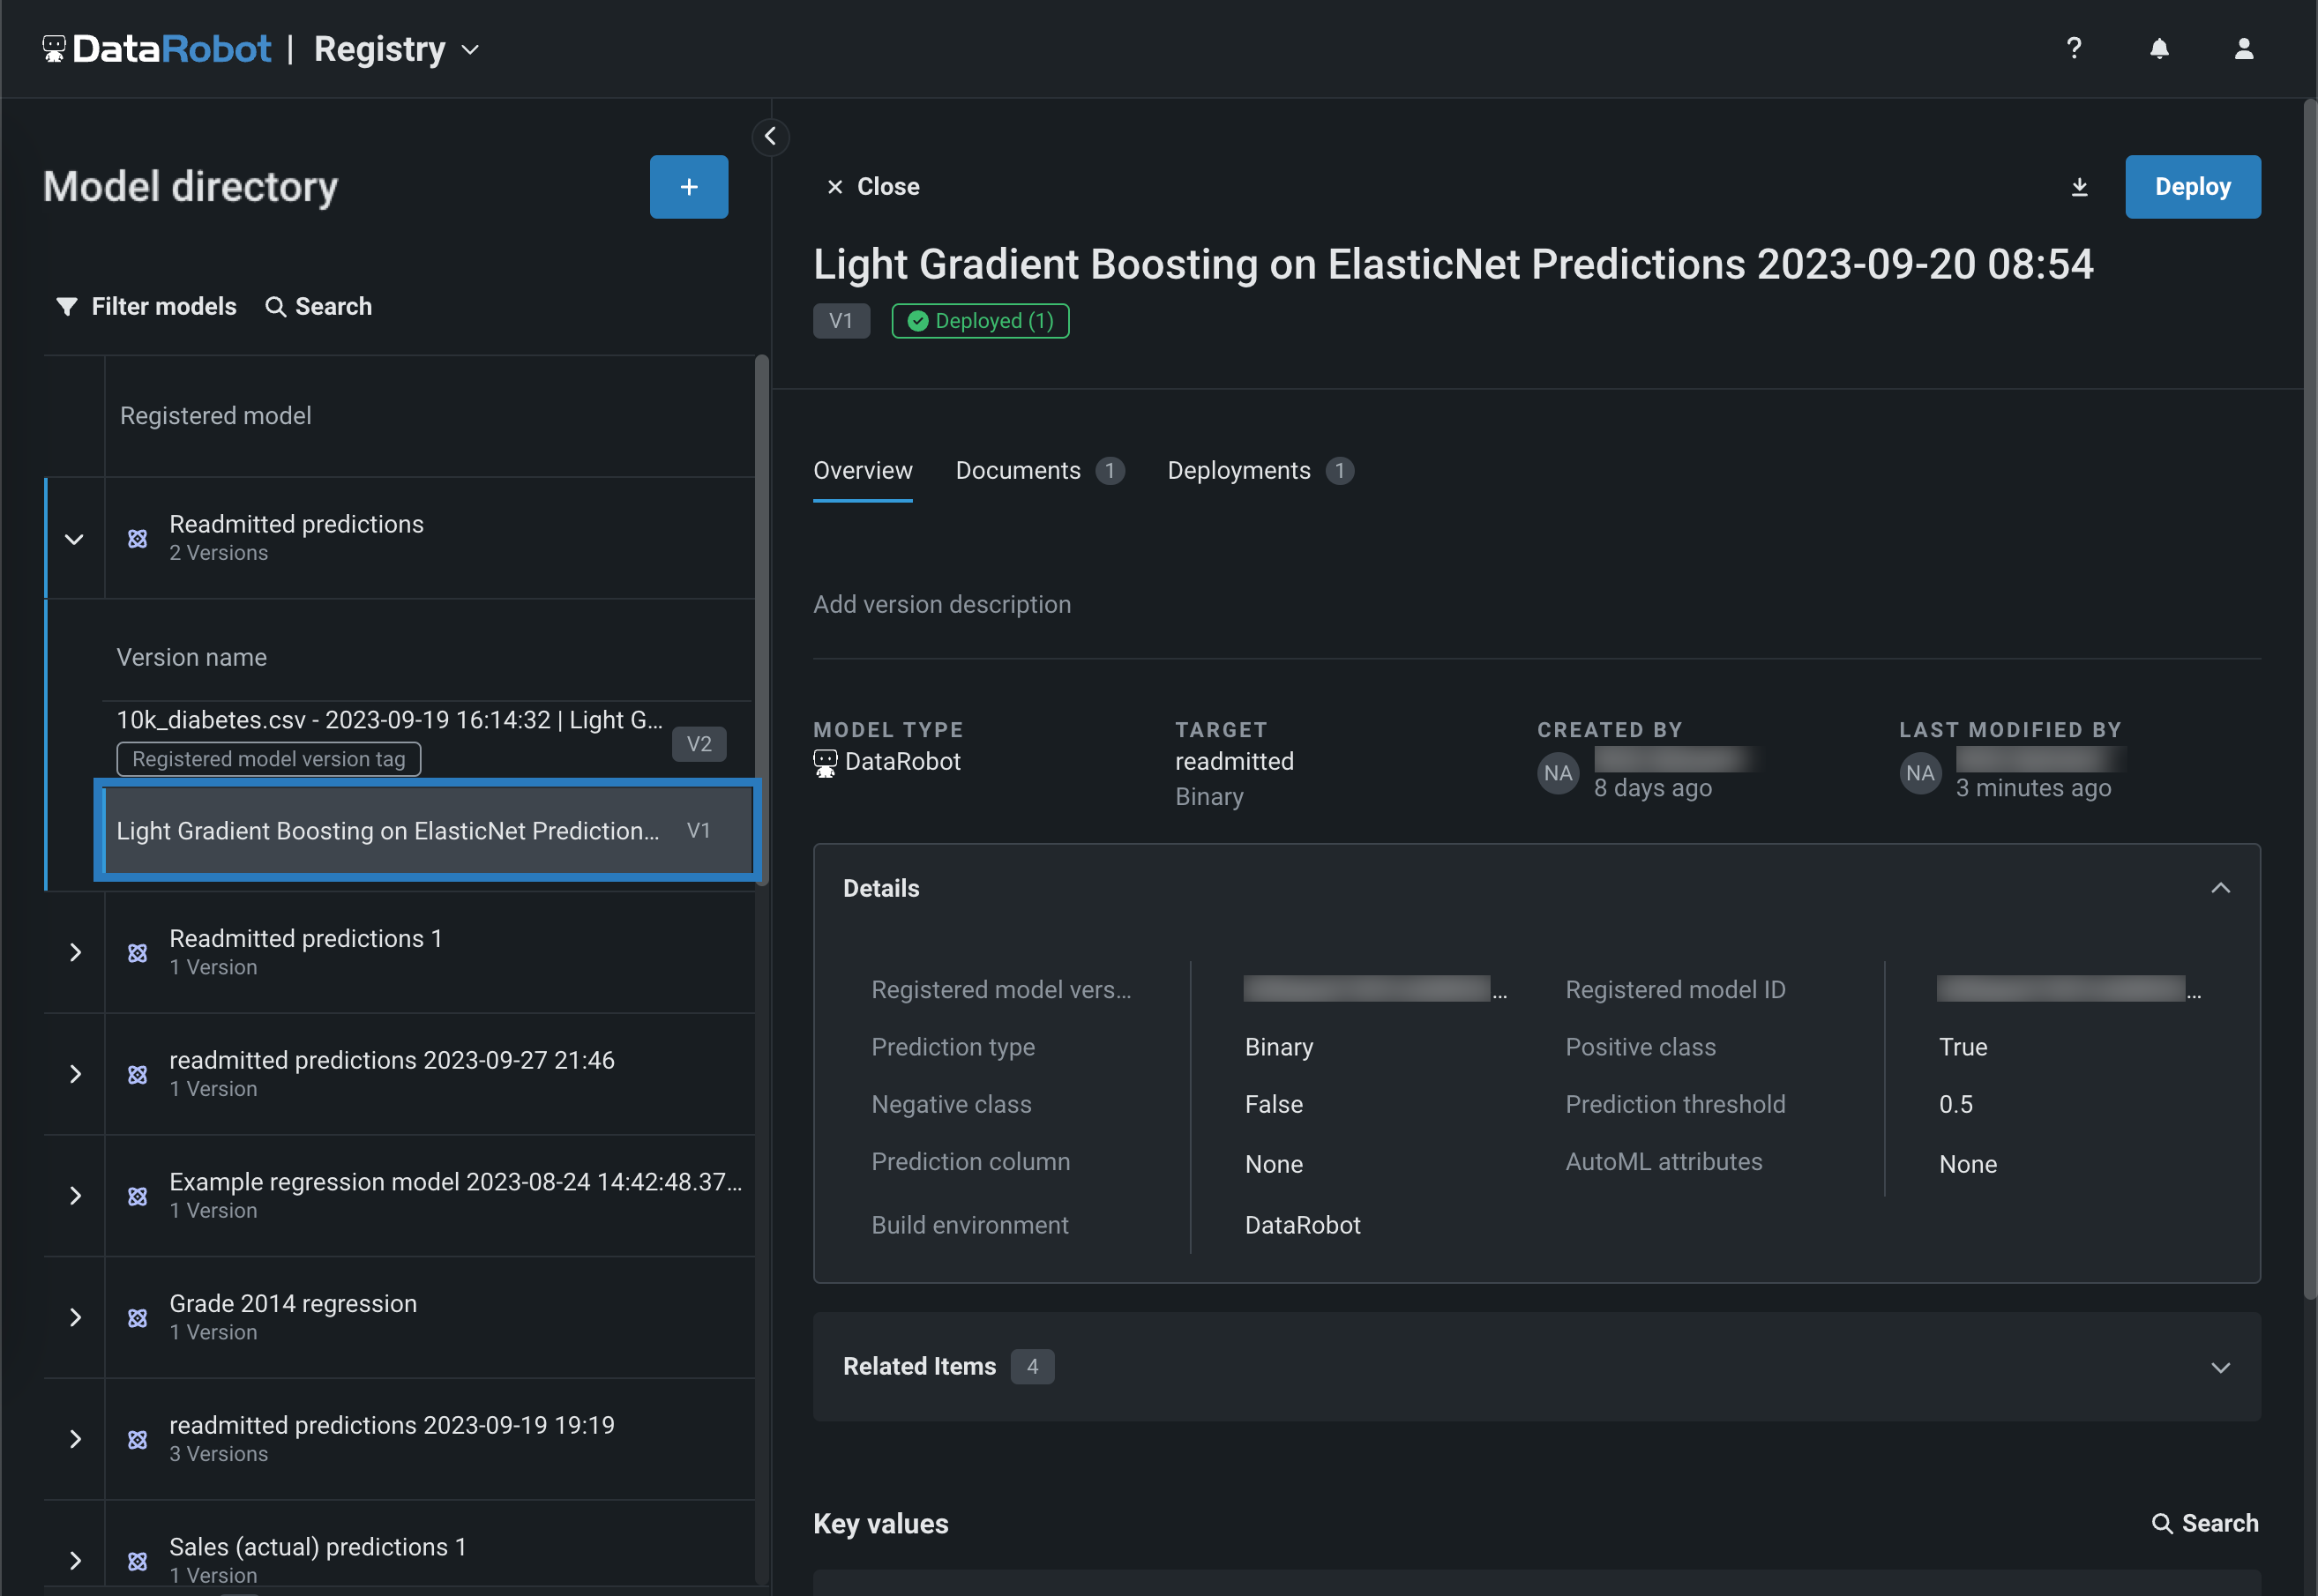
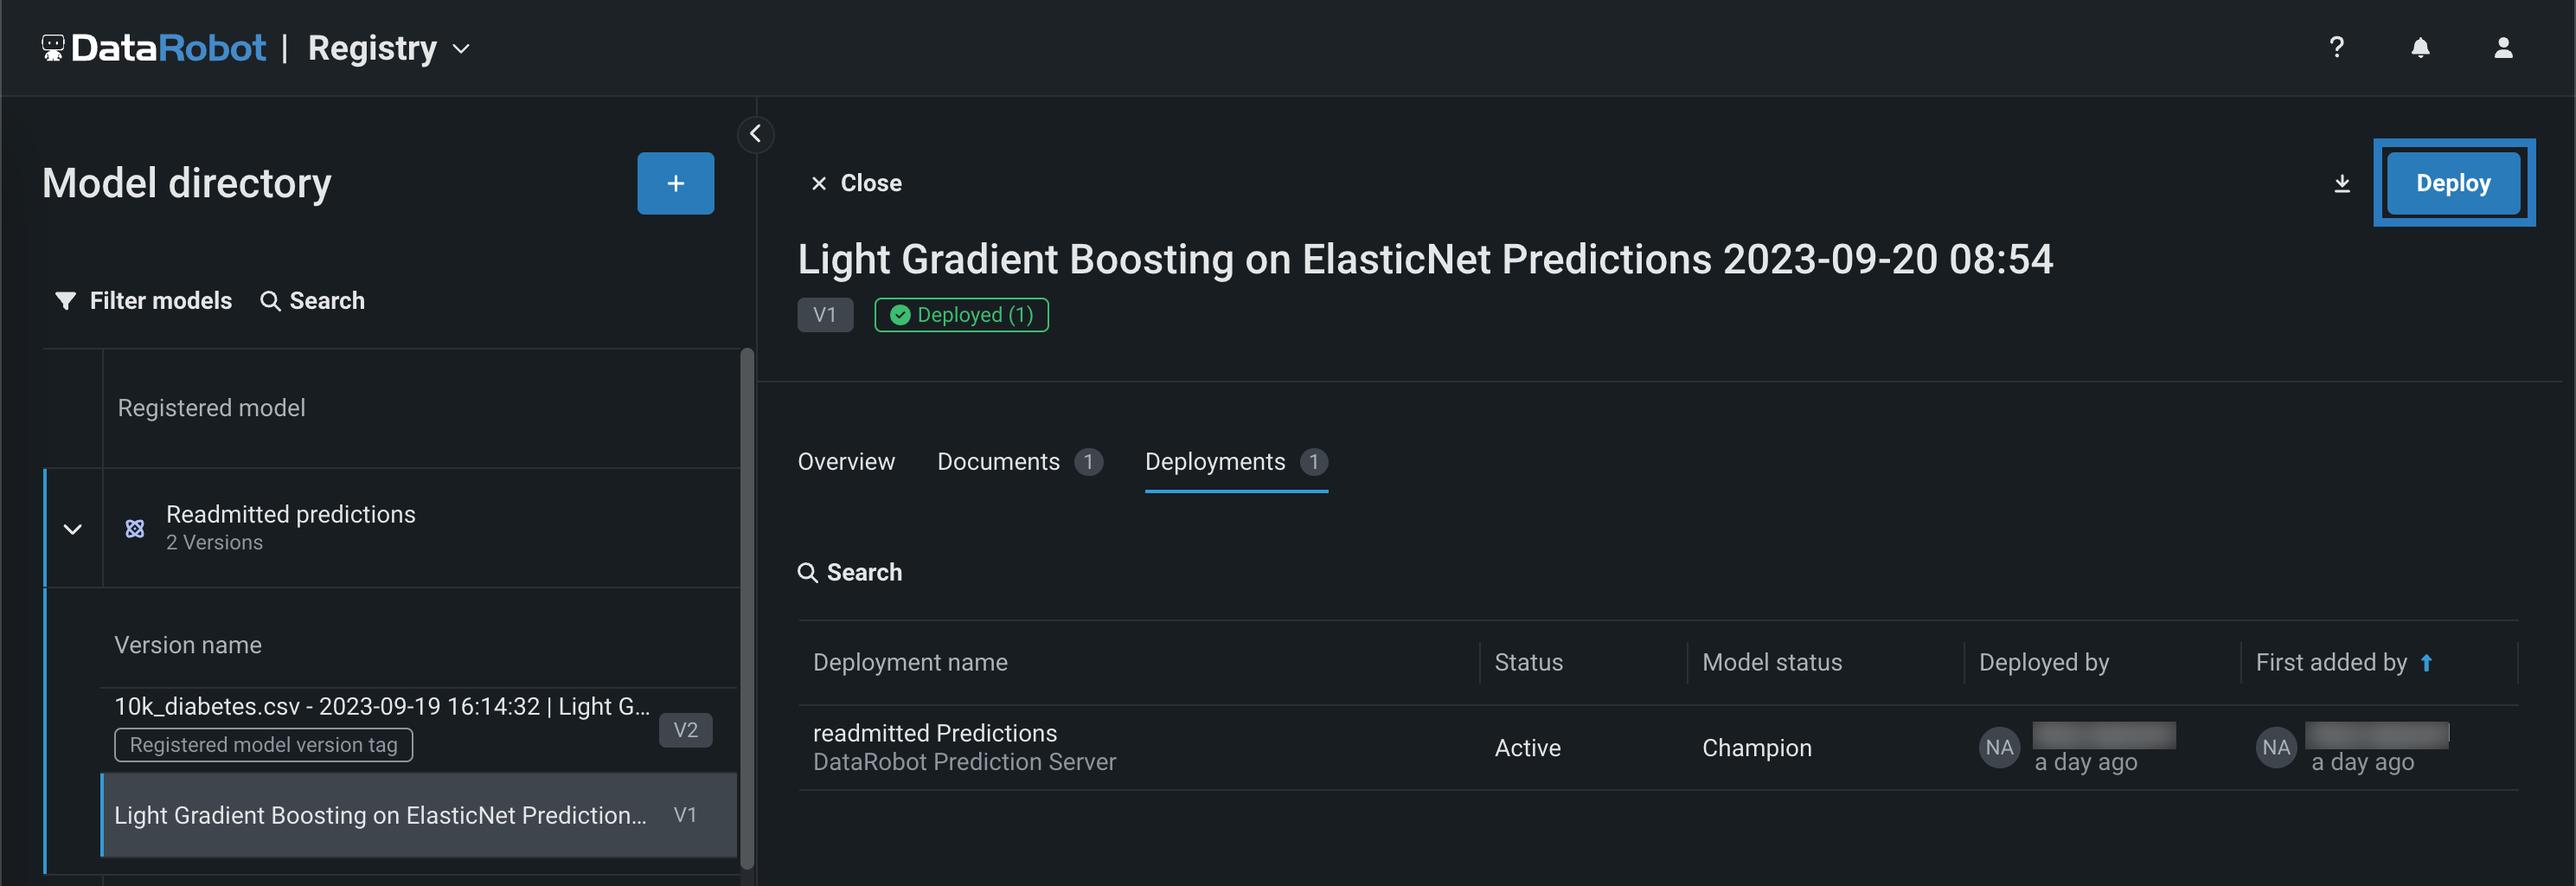
レジストリ > モデルタブの登録モデルのテーブルで、デプロイしたいバージョンを含む登録モデルをクリックすると、バージョンのリストが開きます。
モデルサポート
Snowflakeの予測環境は、スコアリングコードのサポートなしではモデルをサポート しません 。
-
バージョンのリストから、デプロイするスコアリングコード対応バージョンをクリックすると、登録済みモデルバージョンパネルが開きます。
-
登録済みモデルバージョンパネルのいずれかのタブの右上隅で、デプロイをクリックします。
-
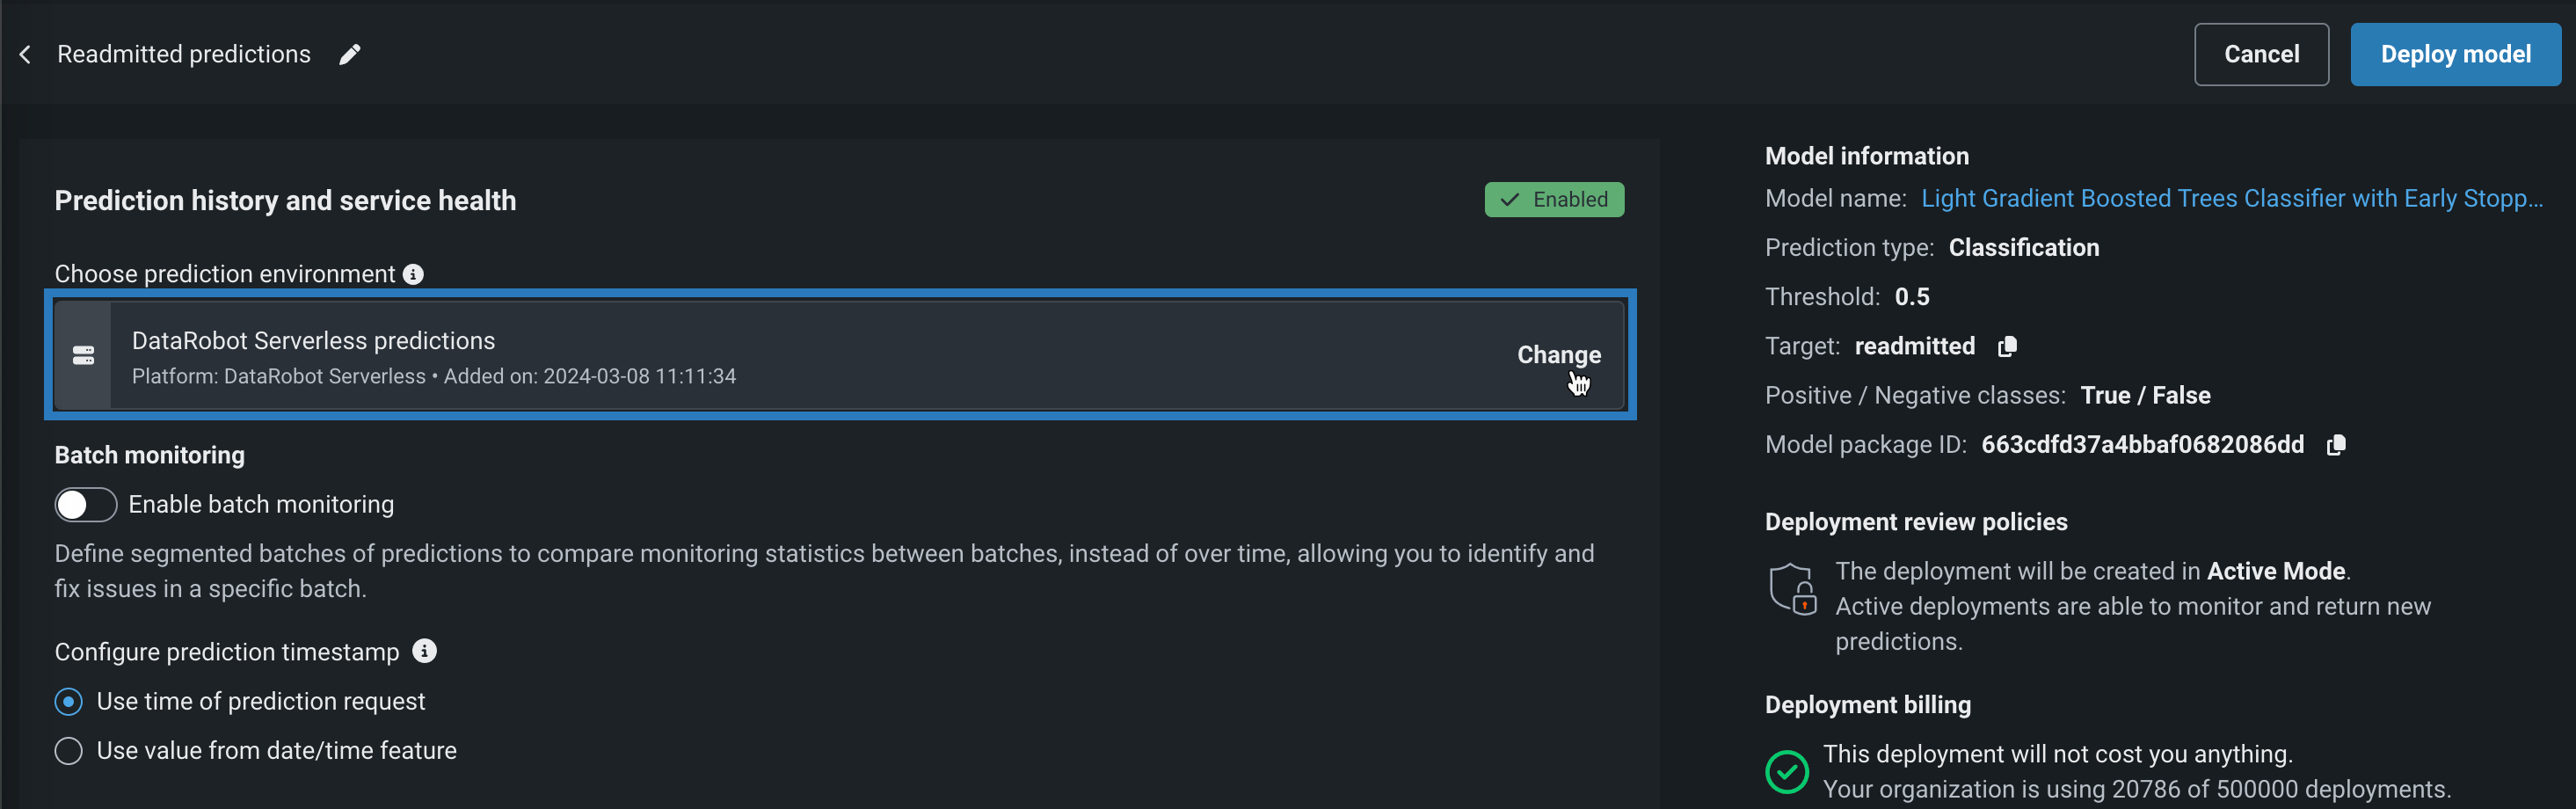
予測履歴とサービスの正常性設定の予測環境の選択の下にある変更をクリックします。
-
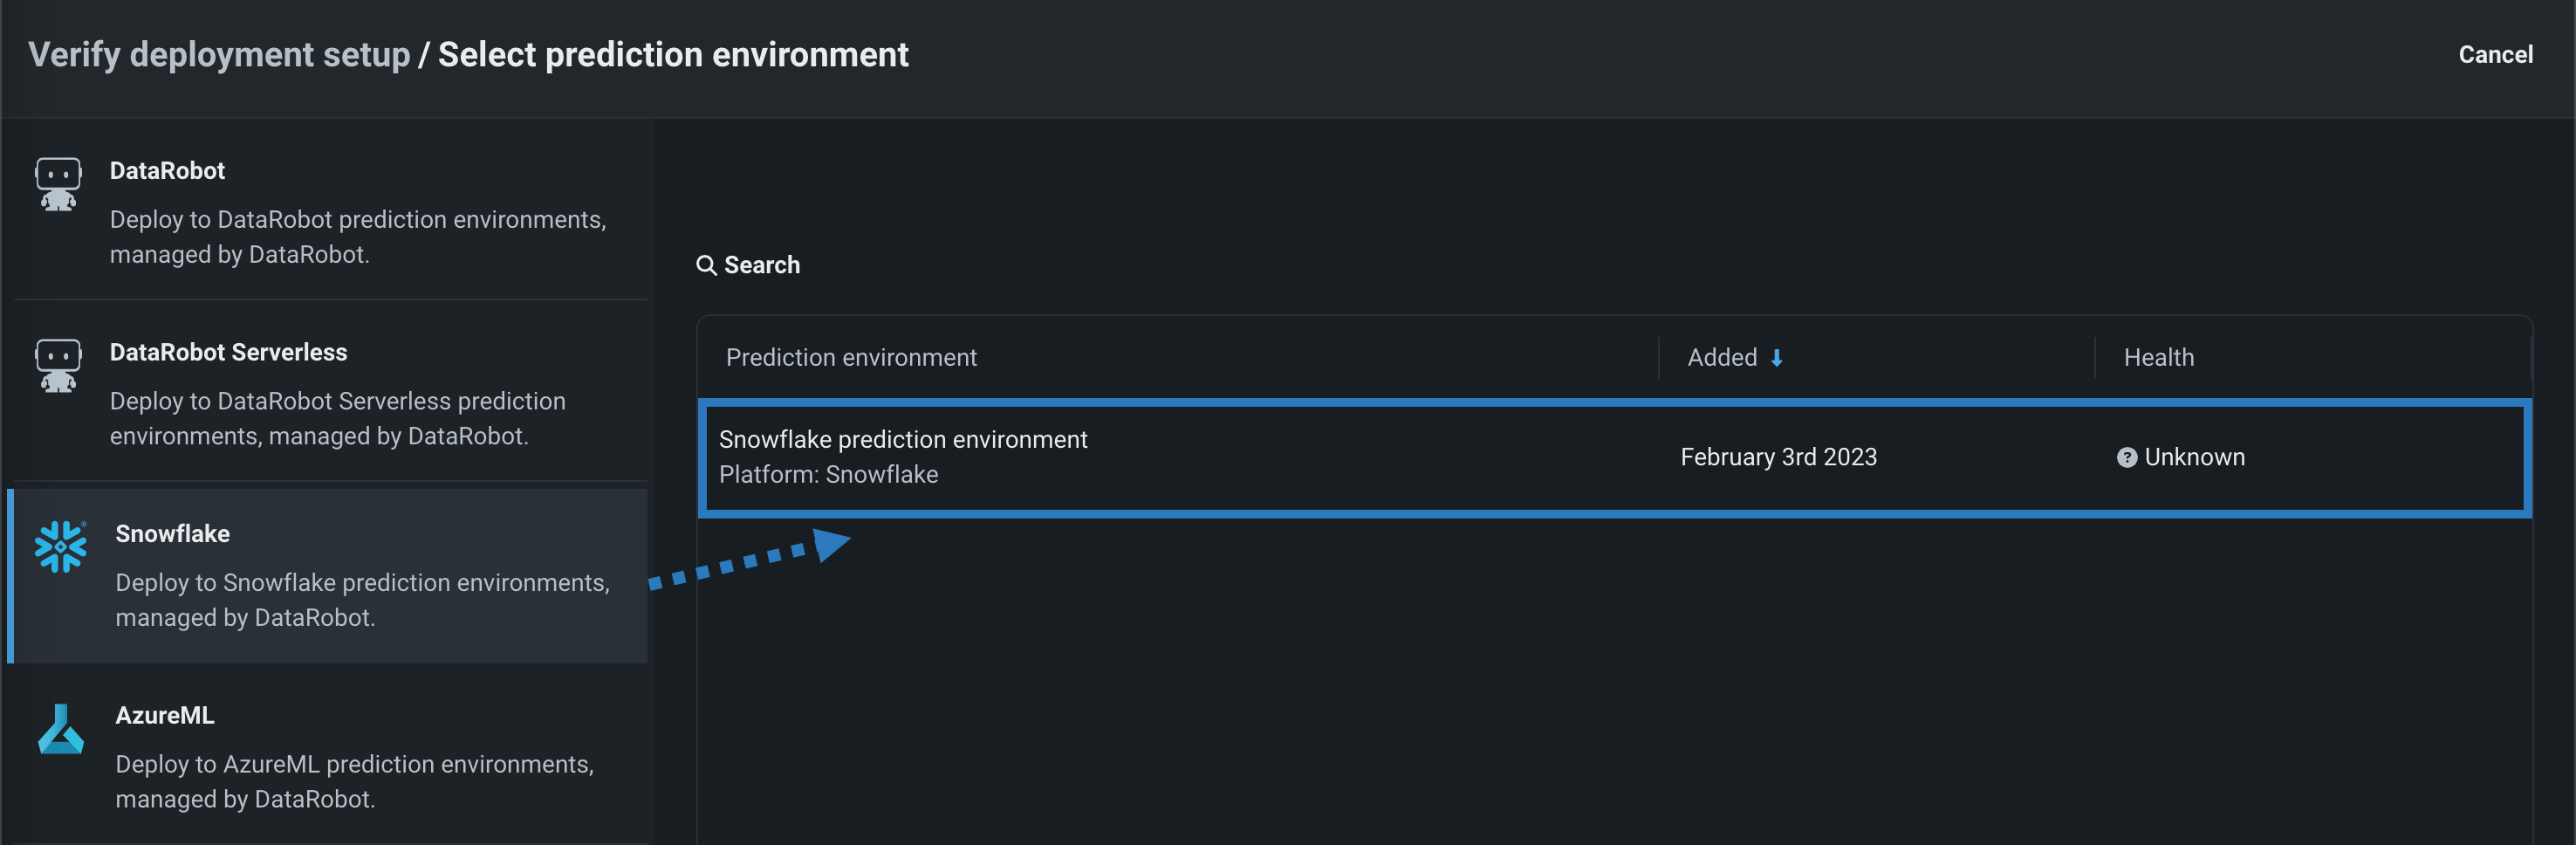
予測環境の選択パネルで、Snowflakeをクリックしてから、デプロイする予測環境をクリックします。
-
(オプション)高度な環境設定を開き、追加の環境キーと値のペアを定義して、Snowflakeデプロイインターフェイスに追加のパラメーターを提供します。
-
残りのデプロイ設定を行い、モデルをデプロイをクリックします。
モデルがSnowflakeにデプロイされると、予測 > ポータブル予測タブのコードスニペットを使用して、Snowflakeでデータをスコアリングすることができます。
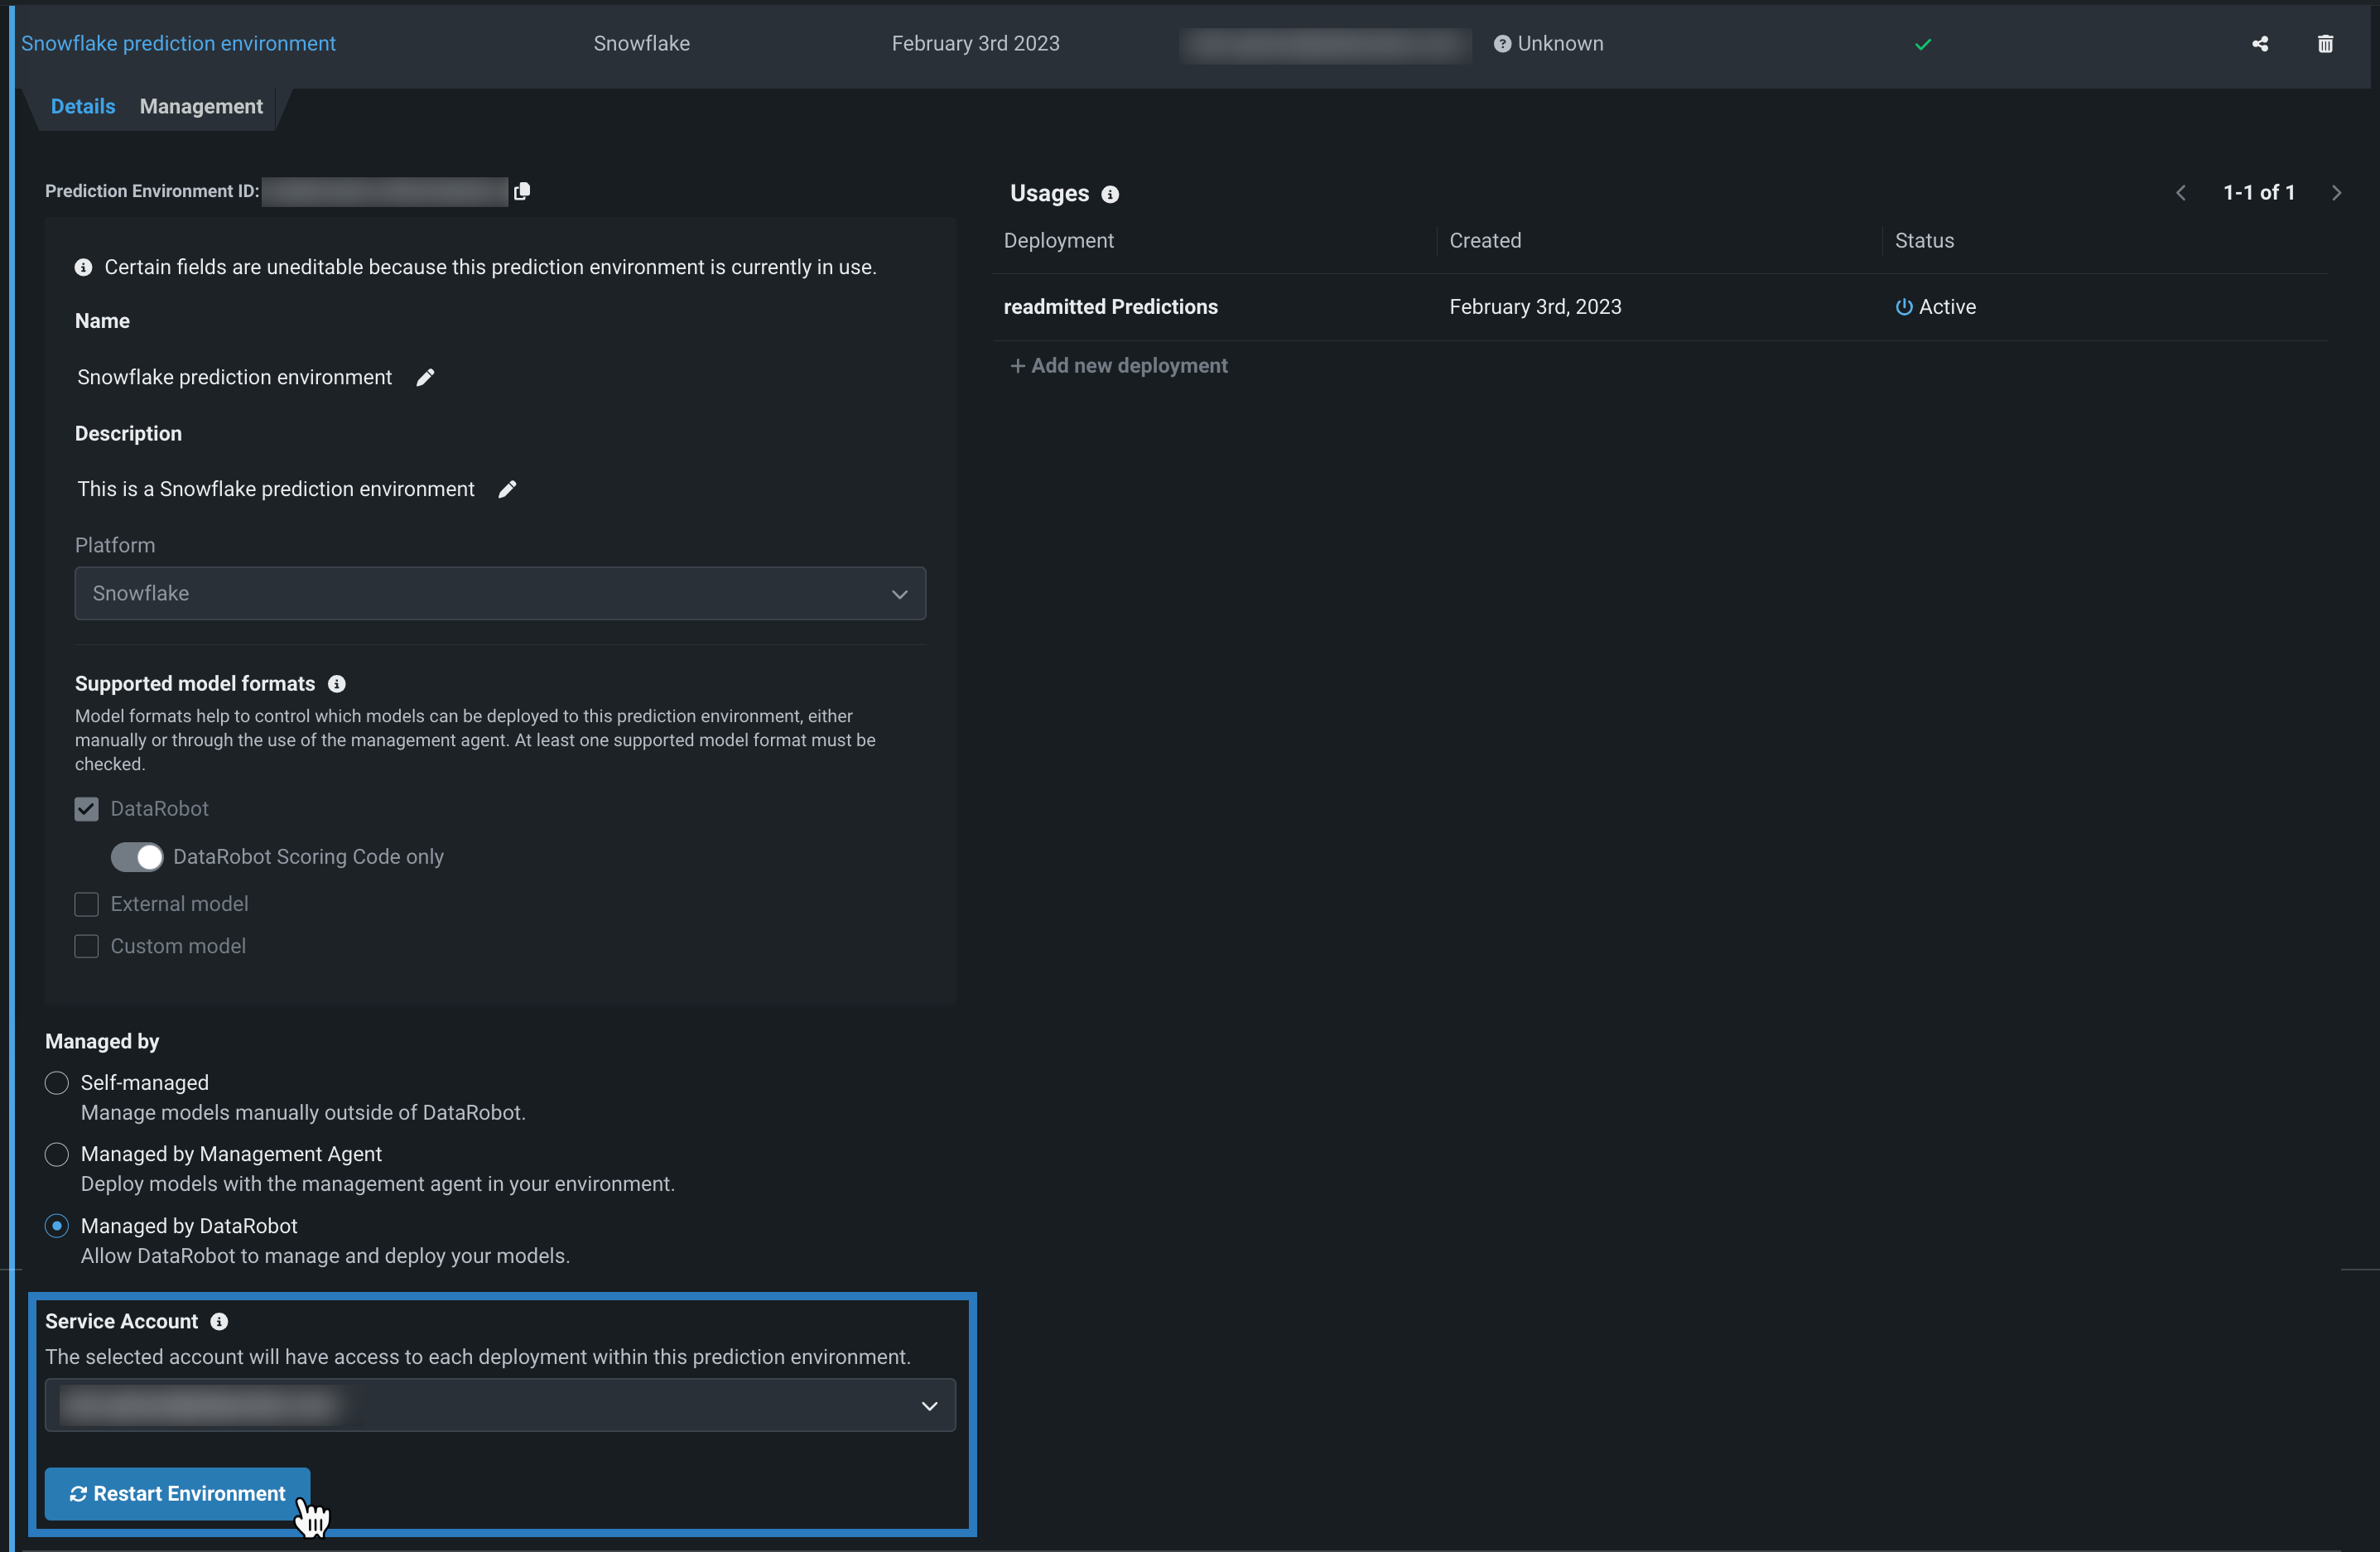
Snowflake予測環境を再起動
予測環境で使用されるSnowflakeデータ接続のデータベース設定または資格情報を更新する場合、環境を再起動して、環境にこれらの変更を適用できます。
-
デプロイ > 予測環境ページをクリックして、リストからSnowflake予測環境を選択します。
-
予測環境設定の下にあるサービスアカウントで、環境を再起動をクリックします。