Snowflakeでのスコアリングコードの自動デプロイと置換
プレビュー
デフォルトでは、Snowflakeでのスコアリングコードの自動デプロイと置換はオフです。 この機能を有効にする方法については、DataRobotの担当者または管理者にお問い合わせください。
機能フラグ:Snowflakeでのスコアリングコードの自動デプロイと置換を有効にする
現在、プレビュー機能として提供されており、DataRobotが管理するSnowflakeの予測環境を作成し、SnowflakeにDataRobotのスコアリングコードをデプロイすることができます。 DataRobotの管理を有効にすることで、外部のSnowflakeへのデプロイは、MLOpsによる管理(スコアリングコードの自動置換など)を利用できます。
外部モデルと監視ジョブのサービス正常性に関する情報
サービス正常性の情報は、エージェントによって監視される外部のデプロイでは入手できません。また、予測監視ジョブを介して予測がアップロードされるデプロイでも入手できません。
Snowflake予測環境の作成
Snowflakeにモデルをデプロイするには、まずカスタムSnowflake予測環境を作成します。
-
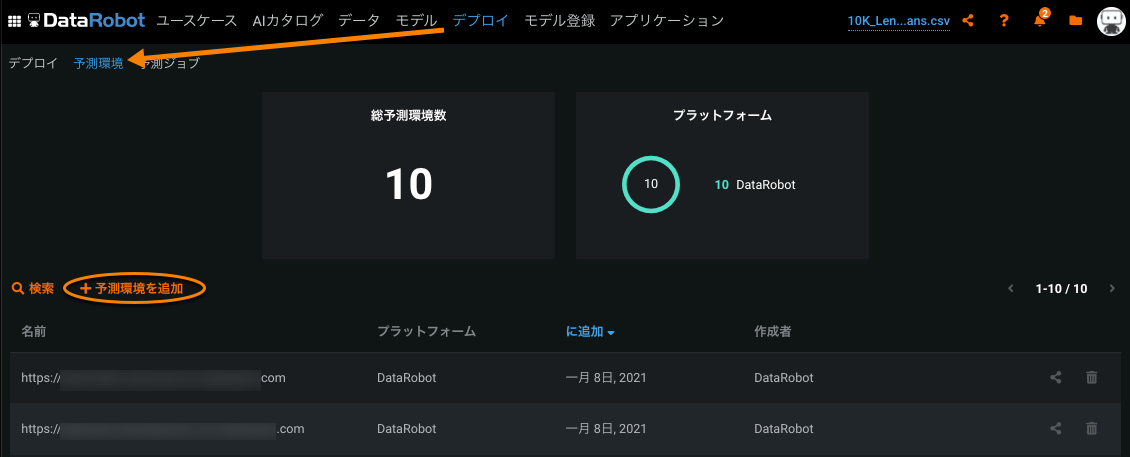
デプロイ > 予測環境をクリックし、予測環境を追加をクリックします。
-
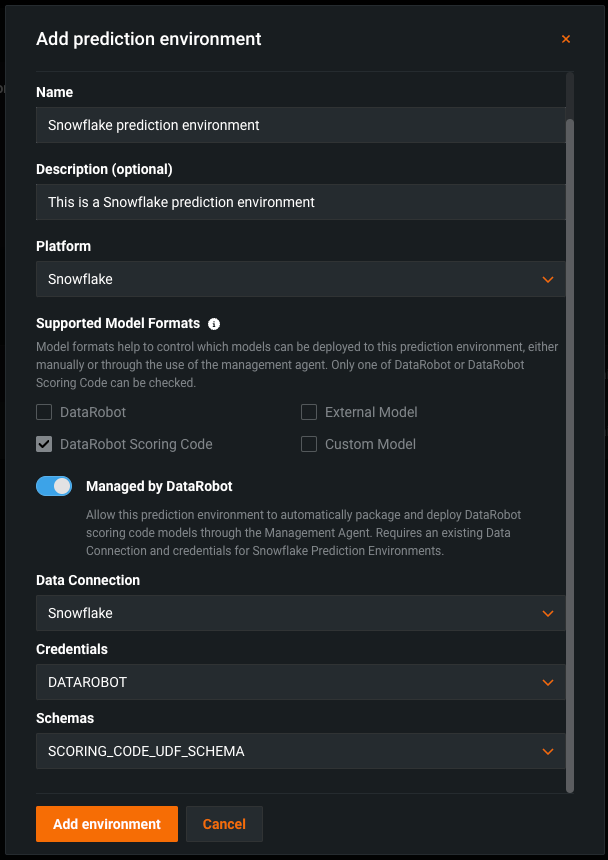
予測環境を追加ダイアログボックスで、予測環境設定を行います。
-
予測環境について、わかりやすい名前を入力し、必要に応じて説明も入力します。
-
プラットフォームドロップダウンリストからSnowflakeを選択します。 サポートされているモデル形式設定は自動的にDataRobotスコアリングコードに設定され、これはSnowflakeでサポートされている唯一のモデル形式であるため、変更できません。
-
DataRobotが管理設定を有効にすると、この予測環境が管理エージェントを介してDataRobotスコアリングコードモデルを自動的にパッケージ化してデプロイできます。
備考
SnowflakeでのスコアリングコードのDataRobot管理には、資格情報が保存されているSnowflakeへの既存のデータ接続が必要です。 既存のSnowflakeデータ接続がない場合は、データ接続が見つかりませんアラートが表示され、データ接続に移動して Snowflake接続を作成するよう指示されます。
-
データ接続と関連する資格情報を選択してから、Snowflakeスキーマを選択します。 Snowflakeスキーマは、Snowflakeテーブルのコレクションです。
-
-
環境設定を行った後、環境を追加をクリックします。
これで、予測環境ページからSnowflake環境を利用できるようになりました。
モデルをSnowflake予測環境にデプロイ
Snowflake予測環境を作成したら、その環境にモデルをデプロイできます。
-
モデル登録 > モデルパッケージをクリックし、Snowflake予測環境にデプロイするスコアリングコード対応モデルを選択します。
ヒント
予測環境で+ 新規デプロイを追加 をクリックして、デプロイ > 予測環境 タブからSnowflake予測環境にモデルをデプロイすることもできます。
-
登録されているモデルバージョンのいずれかのタブで、デプロイをクリックします。
-
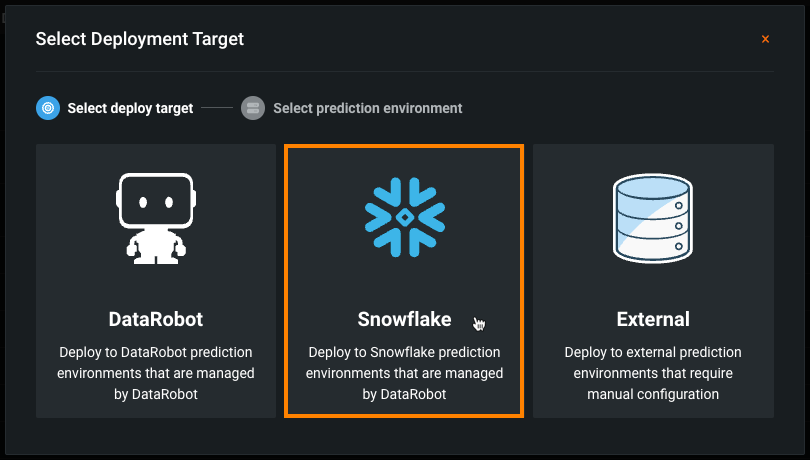
デプロイターゲットを選択ダイアログボックスで、デプロイターゲットを選択からSnowflakeをクリックします。
備考
Snowflakeのデプロイターゲットをクリックできない場合、選択したモデルではスコアリングコードが使用できません。
-
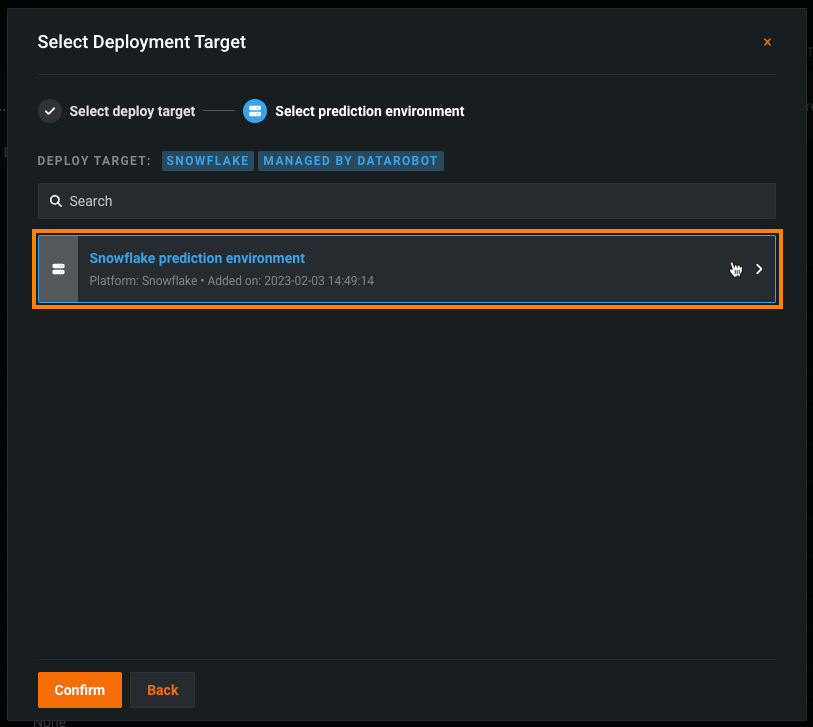
予測環境を選択で、追加したSnowflake予測環境を選択してから、確認をクリックします。
-
デプロイを設定してから、モデルをデプロイをクリックします。
-
モデルがSnowflakeにデプロイされたら、予測 > ポータブル予測タブからデータをスコアリングコードスニペットを使用して、Snowflake内でデータをスコアリングできます。
Snowflake予測環境を再起動
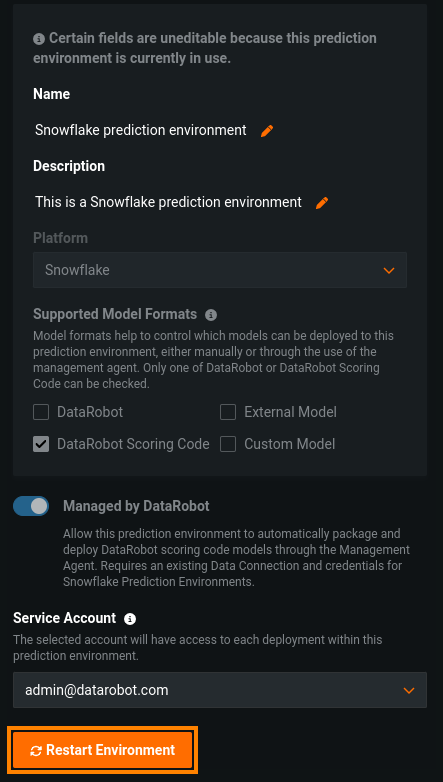
予測環境で使用されるSnowflakeデータ接続のデータベース設定または資格情報を更新する場合、環境を再起動して、環境にこれらの変更を適用できます。
