Decision Intelligence Flows
Availability information
The Decision Intelligence Flows feature is off by default. Contact your DataRobot representative or administrator for information on enabling the feature.
Feature flag: Enable Decision Ops, Enable Decisions MLOps integration
Availability information
The Decision Intelligence Flows feature is off by default. Contact your DataRobot representative or administrator for information on enabling the feature.
Feature flag: Enable Decision Ops
Now available for preview, Decision Intelligence Flows provide the ability to post-process predictions using a series of complex rules and business logic—accelerating decision-making and improving overall business performance.
The decision flow editor, accessed from the Decisions tab, allows you to combine known and fixed business rules with the post-process prediction scores of one or more deployments to output a single decision. DataRobot then tests the end-to-end flow while preparing a CSV with the decisions (SaaS only). After a successful test, deploy a decision flow to continuously generate decisions, as well as to monitor the service health and activity.
Decisions tab
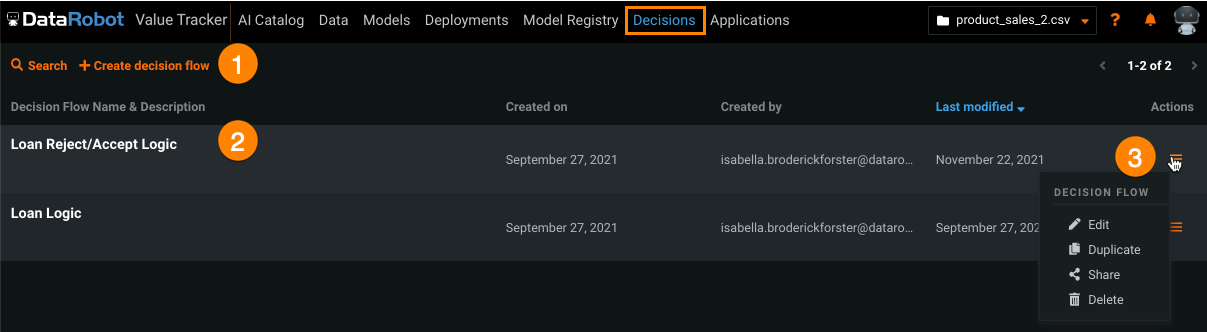
The Decisions tab, located at the top of DataRobot, allows you to create new decision flows and manage existing ones.
| Element | Description | |
|---|---|---|
| 1 | Create decision flow button | Creates a new decision flow. |
| 2 | Decision flows | Lists all decision flows owned by and shared with you. |
| 3 | Actions menu | From the actions menu, you can:
|
Create a decision flow
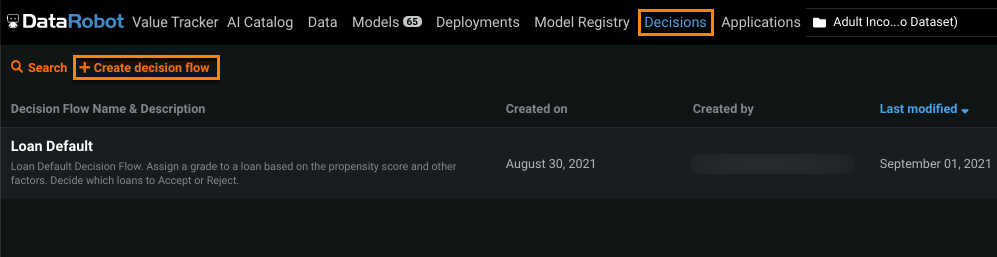
To open the decision dashboard and flow editor, click the Decisions tab. Before creating a decision flow, make sure you have at least one dataset—stored locally or in the AI Catalog—and deployed production model.
-
Click Create decision flow.
-
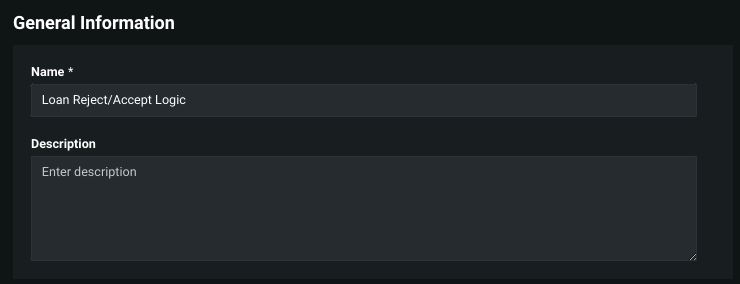
Under General Information, enter a name and description (optional).
-
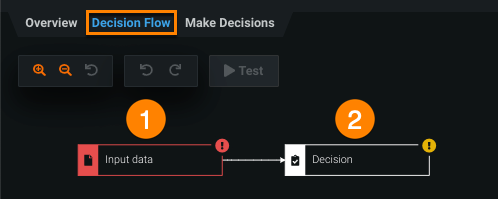
Click the Decision Flow tab to begin building the decision flow. Every decision flow starts with two nodes: (1) a input data node and (2) a decision output node.
-
To get started, add a dataset by selecting the input data node and clicking the select input data icon. Add a training dataset from your computer or the AI Catalog.

-
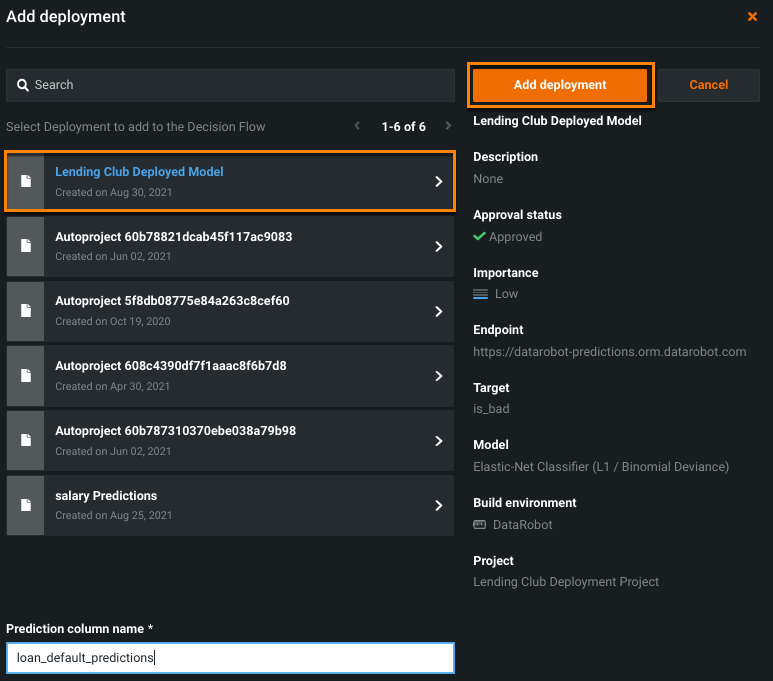
Now, add a deployment to incorporate model predictions into the flow. With the input data node still selected, click the Add icon and select Deployment.

-
Select a deployed model from the list and click Add deployment. If the Prediction column name matches an existing feature in the training dataset, you must enter a unique name in the field.
Configure nodes
A decision intelligence flow is made up of various nodes that allow you to interact with data and apply logic. The following table provides a description of each node type:
| Node type | Description |
|---|---|
| Input data | Adds a training dataset from your computer or the AI Catalog. |
| Deployment | Creates a new feature from the predictions of a deployed model. Returns model predictions as a new feature. You can add up to five deployment nodes. |
| Transform | Creates a numeric feature using feature transformation. |
| Rule | Creates a categorical feature using a series of if/then statements. |
| Split | Splits a feature into multiple branches based on its values. |
| Decision | Defines an outcome for the decision flow. |
To add nodes to a decision flow, make sure the adjoining node is selected and click the Add icon on the side you'd like the node to appear. Then, select a node from the dropdown menu.
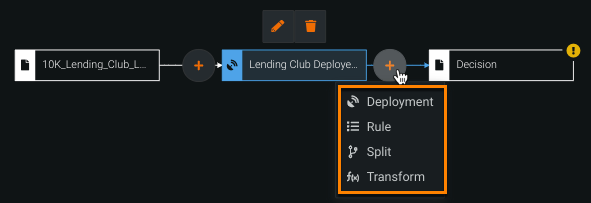
Note
Logic nodes are only available after selecting a dataset for the input data node.
Transform nodes
The Transform node allows you to add an additional layer of logic by transforming features in the training dataset.
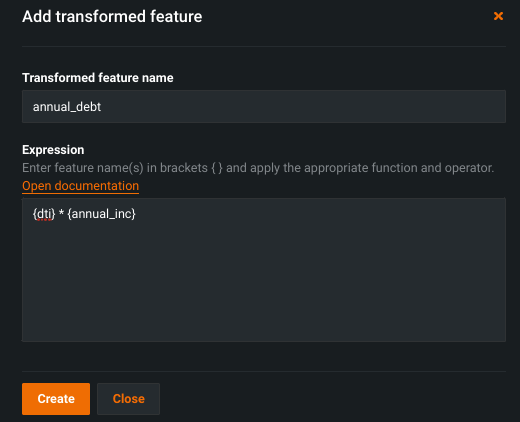
The above example creates a new feature called annual debt, which is debt-to-income (dti) multipled by annual income (annual_inc), to calculate the amount of debt each loan applicant has.
Override features
Using the Transform node, you can override features from the input dataset or features introduced in the decision flow—meaning the output dataset will have features of the same name but with different values.
To override an existing feature, you must enter the feature name exactly as it appears in the dataset or decision flow, otherwise, the node will create a new column. After entering the name of the feature you want to override under Transformed feature name—a warning that the feature by that name already exists and will be overwritten appears. You can only override features of the same type (e.g., categorical, numeric, etc.).
![]()
The above example redefines the numeric feature annual_income as {annual_income}+10000, so when this feature is used in subsequent nodes, the feature value will be increased by 10000.
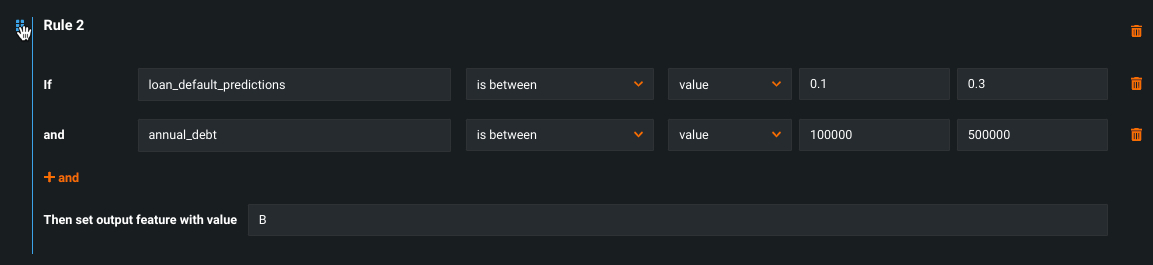
Rule nodes
The Rule node creates a categorical feature by grouping data based on if/then conditions and then assigning those groups a value. Note that the Rule node is order dependent—starting with the first rule, DataRobot looks for data that matches the criteria and assigns it the defined output value, continuing this process for all subsequent rules. You can group the data that do not match any rules and assign them a value or you can leave them empty.
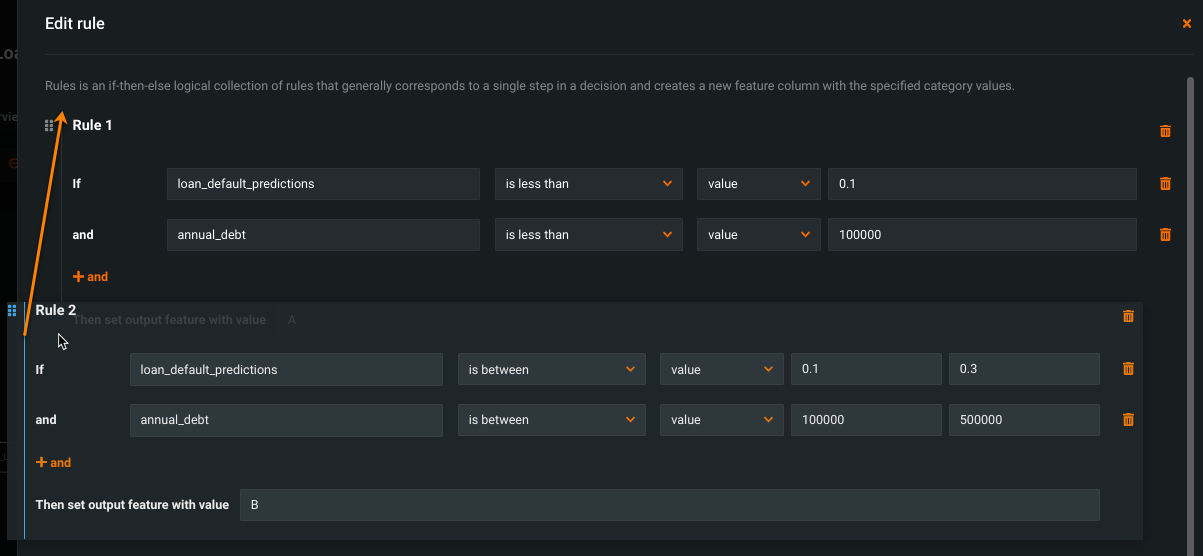
To add more if/then rules, click Add rule at the bottom of the dialog. You can also define a name for the feature under Output feature name.
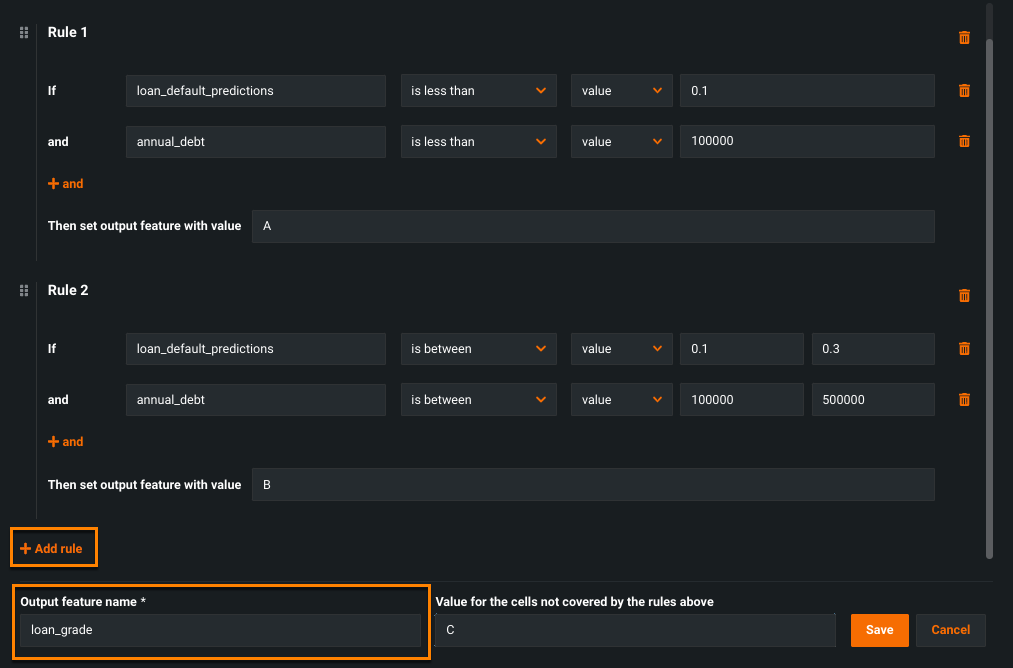
The above example creates a new categorical feature called loan_grade, which groups loans based on the model's predictions (loan_default_predictions) and the applicant's debt (annual_debt), two factors that historically impact the decision to accept or reject a loan. Rule 1 assigns the value A to applicants with loan_default_predictions less than 0.1 and annual_debt less than 100000. Rule 2 assigns the value B to applicants with loan_default_predictions between 0.1 and 0.3 and annual_debt between 100000 and 500000.
Reorder rules
To reorder if/then rules:
-
Hover over the rule you want to move; a blue line appears on the left side.
-
Drag-and-drop the rule to the desired location.
-
Click Save.
Define leftover values
You can group all leftover values that do not meet the rule criteria using else logic by entering a value under Value for the cells not covered by the rules above. Note that DataRobot fulfills each if/then rule before assigning a value to the leftover data.
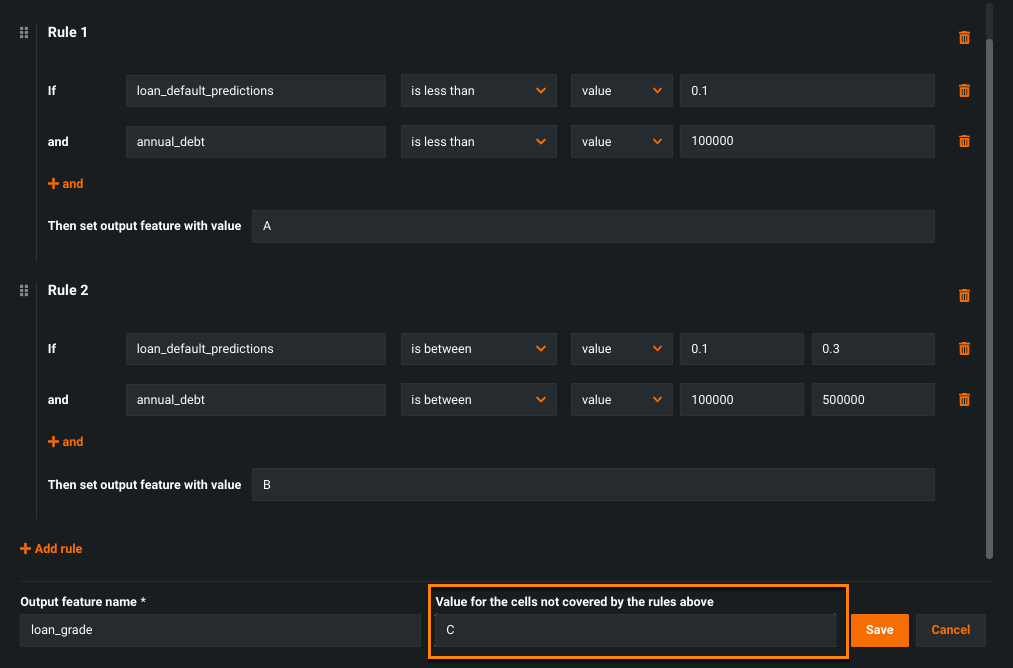
In the example above, any values that do not meet the criteria defined in Rule 1 and Rule 2 are assigned the output value C.
Split nodes
The Split node allows you to split a chosen feature into separate branches based on its feature values so that you can take different actions for each value.
There are two ways to create branches:
- Click Prepopulate branches to automatically create a branch for each feature value. This option is only available for categorical features.
- Click Add branch to manually add branches.
Any values leftover are grouped into their own branch.
Note
Numeric features are often binned as categorical feature because bins will only split on the feature values themselves. Create a categorical feature using a rule and split the resulting node.
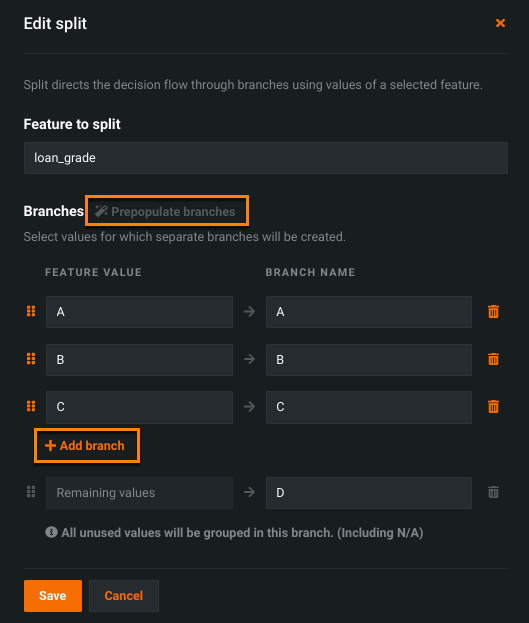
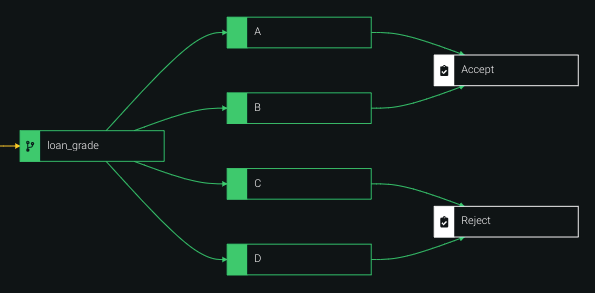
In this example, loan_grade is split into three branches, one for each grade (A, B, and C) defined in the rule node and an additional branch for any remaining values (D). Now, if loans in group C and D are considered risky, you can decide to reject loan applicants that fall into these categories, while accepting those that fall into group A or B.
Decision nodes
The Decision node allows you to define an output value (i.e., decision) for one or more nodes in the decision flow. After adding a decision node, select the appropriate decision type—Categorical or Numeric—for your use case. Use the tabs below to finish configuring a decision node for the selected type.
In the decision node window, select Categorical from the Type of all decisions dropdown. The following table describes the available configuration options for categorical decisions:
| Output type | Output value |
|---|---|
| Static value | A user-defined value (for example, Accept or Reject). |
| Rule set | A rule set feature defined in an existing rule node in the decision flow. |
In the example below, loans in group A and B are unlikely to default, so they are assigned the decision Accept. Loans in group C and D are more likely to default, so they are assigned the decision Reject.
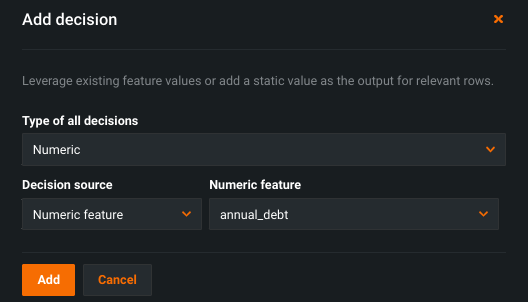
In the decision node window, select Numeric from the Type of all decisions dropdown. The following table describes the available configuration options for numeric decisions:
| Output type | Output value |
|---|---|
| Static value | A user-defined numeric value (for example, -1 or 0). |
| Numeric feature | A numeric feature created for the decision flow or from the original dataset. |
In the example below, the numeric decision node defines the output type as Numeric feature and the output value as annual_debt.
Running the decision flow generates an output with annual_debt calculated for each applicant.

Note
DataRobot supports one decision type per flow. For example, if you add a decision node with a categorical output, and then add another decision node with a numeric output, all categorical nodes will be reset.
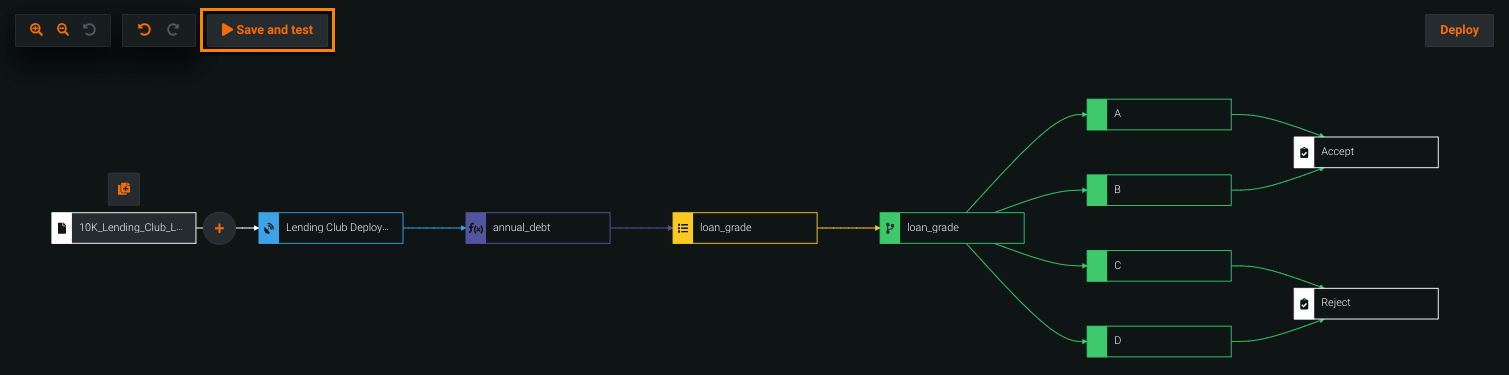
Save and test a flow
After configuring a decision flow, click Save in the upper-right corner. Click the now active Test button in the upper-left corner; DataRobot tests the end-to-end decision flow, starting with the training dataset and ending with the decision.
Warning
If you leave the page without saving, your progress will be lost.
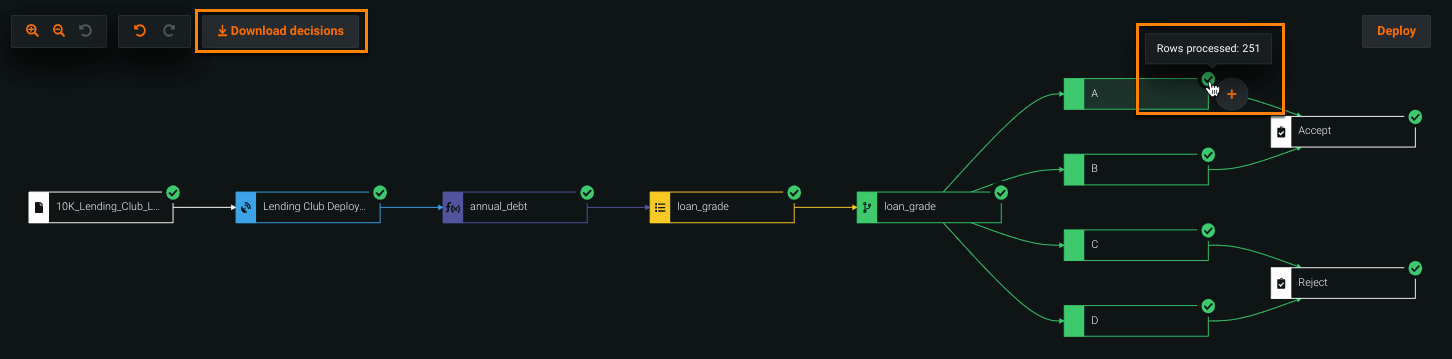
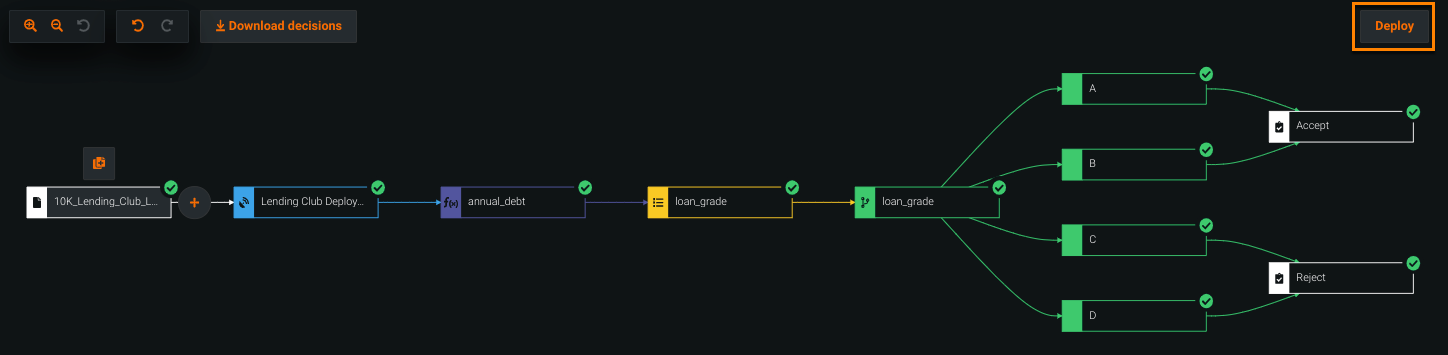
A green check mark appears next to each node to indicate the test was successful. Hover over the check mark to view how many rows were processed on that node. When testing is complete, click Download decisions to download a CSV of the results, which includes a column for the decision and any features created for the decision flow (for example, loan_grade and annual_debt).

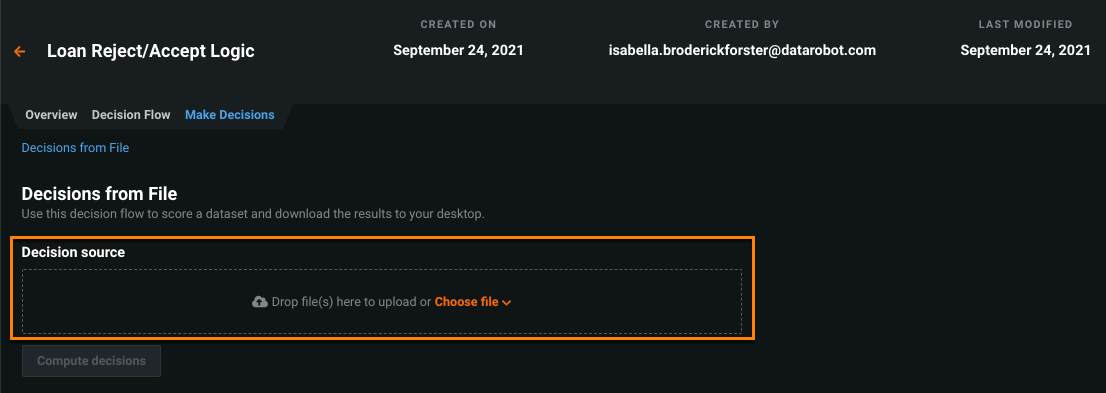
To score new data, navigate to the Make Decisions tab and click Choose file to select a file from your computer or AI Catalog, or drag and drop a file into the Decision source box.
Deploy a decision flow
SaaS only
The ability to deploy decision flows is only available for users on the Managed AI platform.
After running a successful test on a decision flow, the Deploy button activates, allowing you to deploy the decision. All deployed decision flows are listed in Deployments > Decisions, where you can access the Decision API and monitor its service health as it continuously scores incoming data.
-
On the Decision Flow tab, click Deploy.
-
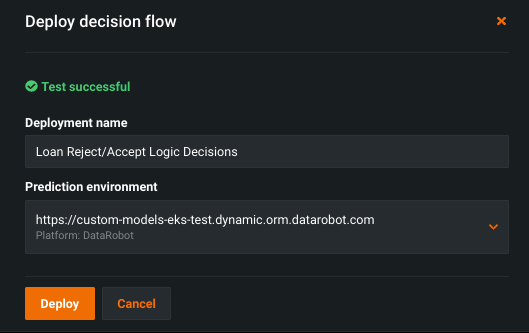
Review the deployment name and prediction environment, then click Deploy. For lower latency, it's recommended to use the same prediction environment as the deployment nodes in your decision flow.
-
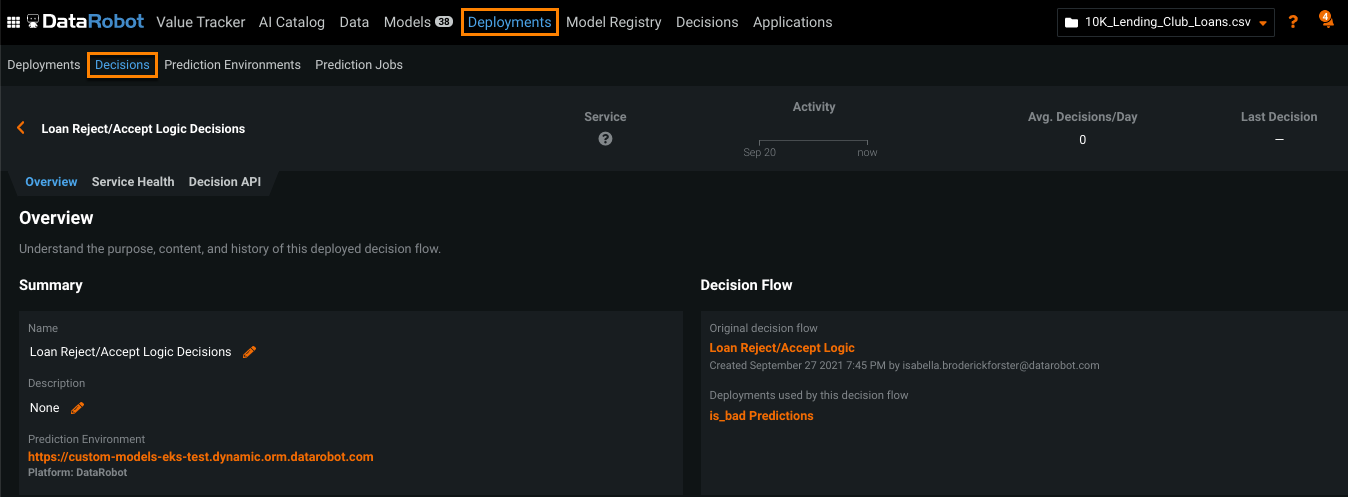
When the decision flow is successfully deployed, click View deployment. This opens an overview in the Deployments > Decisions tab.
Considerations
Consider the following when using Decision Intelligence Flows:
- Decision flows are only available for binary classification and regression models.
-
The following are not supported in decision flows:
- Time series deployments
- MLOps data drift tracking for decision deployments
- MLOps accuracy tracking for decision deployments
- MLOps retraining
-
Supports a maximum of 100 decision flow nodes.
- Supports up to five deployment nodes in one decision flow.
- (Self-Managed) You can include up to 5 models in a decision flow.
- (SaaS) You can include up to 15 models in a decision flow.