Data connection UI improvements
Availability information
The new data connection page is off by default. Contact your DataRobot representative or administrator for information on enabling the feature.
Feature flag: Enable New Data Connection UI
Now available for preview, DataRobot introduces improvements to the data connection user interface that simplifies the process of adding and configuring data connections. Instead of opening multiple windows to set up a data connection, after selecting a data store, you can configure parameters and authenticate credentials in the same window. For each data connection, only the required fields are displayed, however, you can define additional parameters under Advanced Options at the bottom of the page.
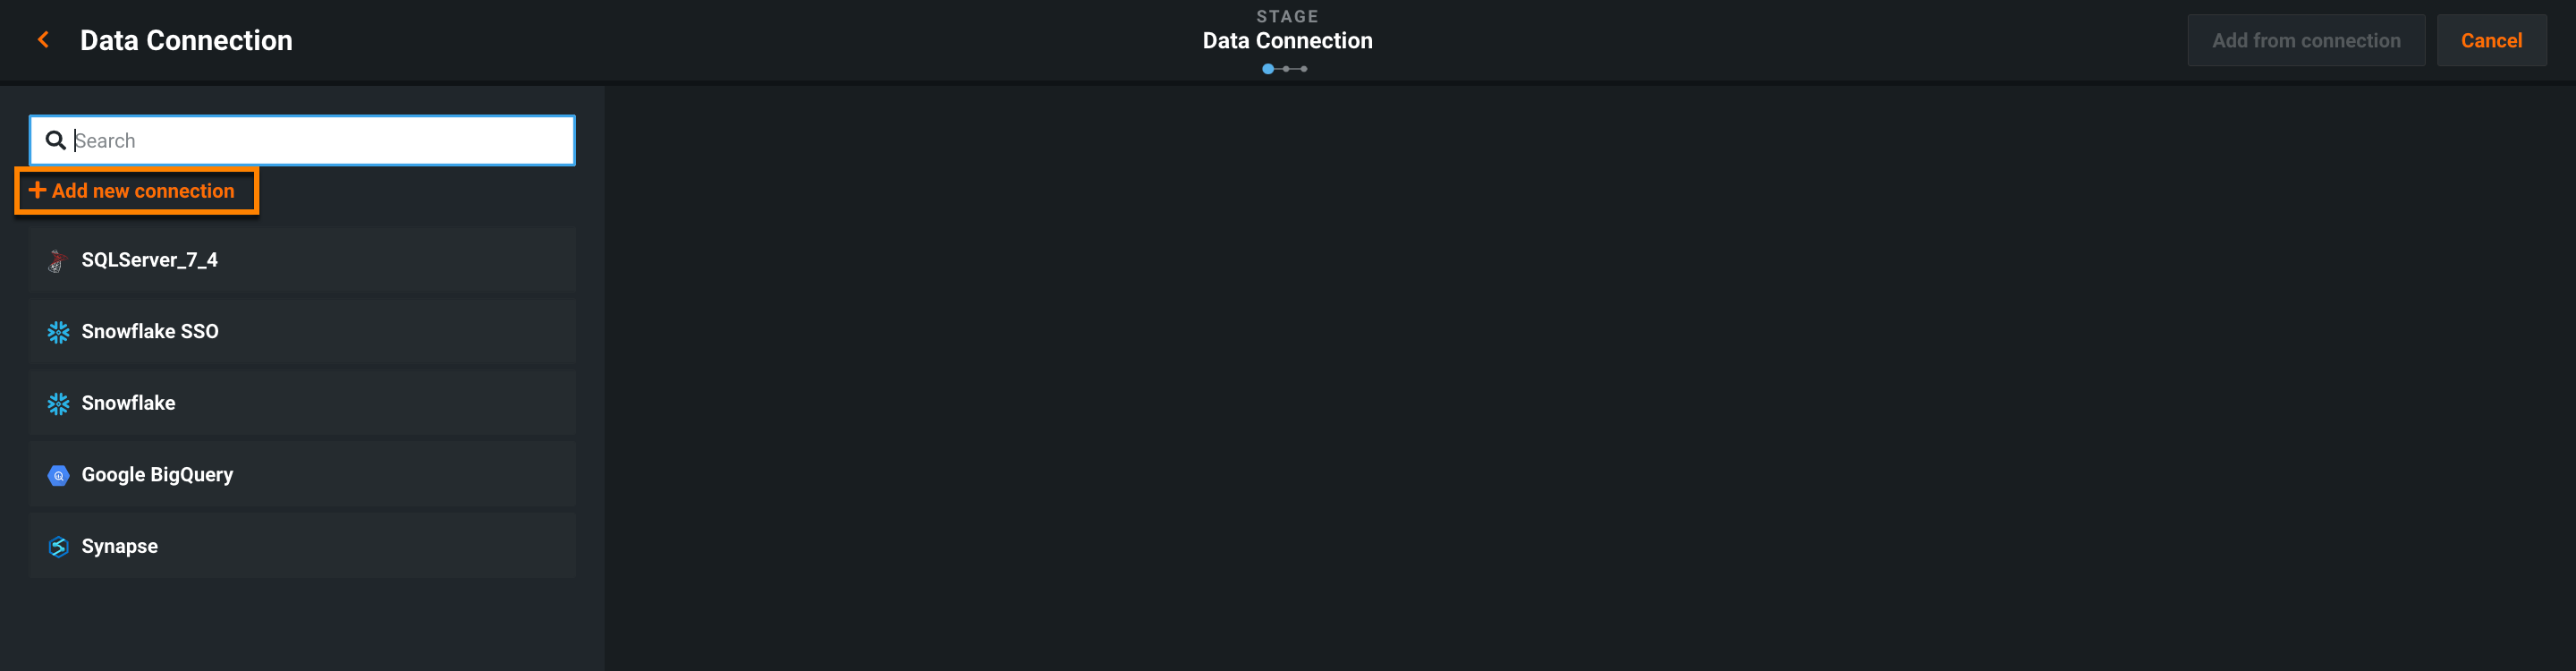
- To access the new data connections page, go to the AI Catalog.
-
Click Add to Catalog and select Data Connection.

-
All existing connections are displayed on the left. If you select a configured connection, its configuration options are displayed in the center.
-
To add a new data connection, click Add new connection.
-
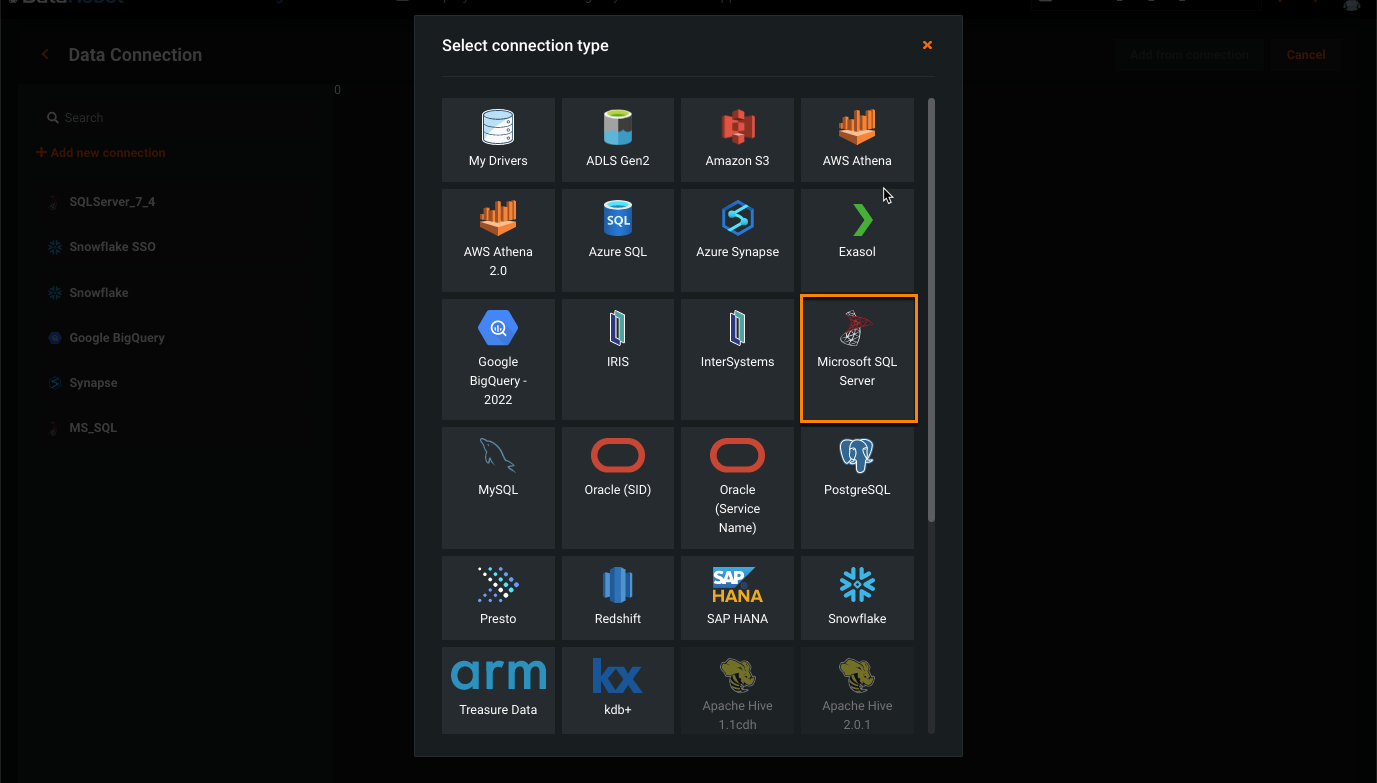
Select a connection type.
-
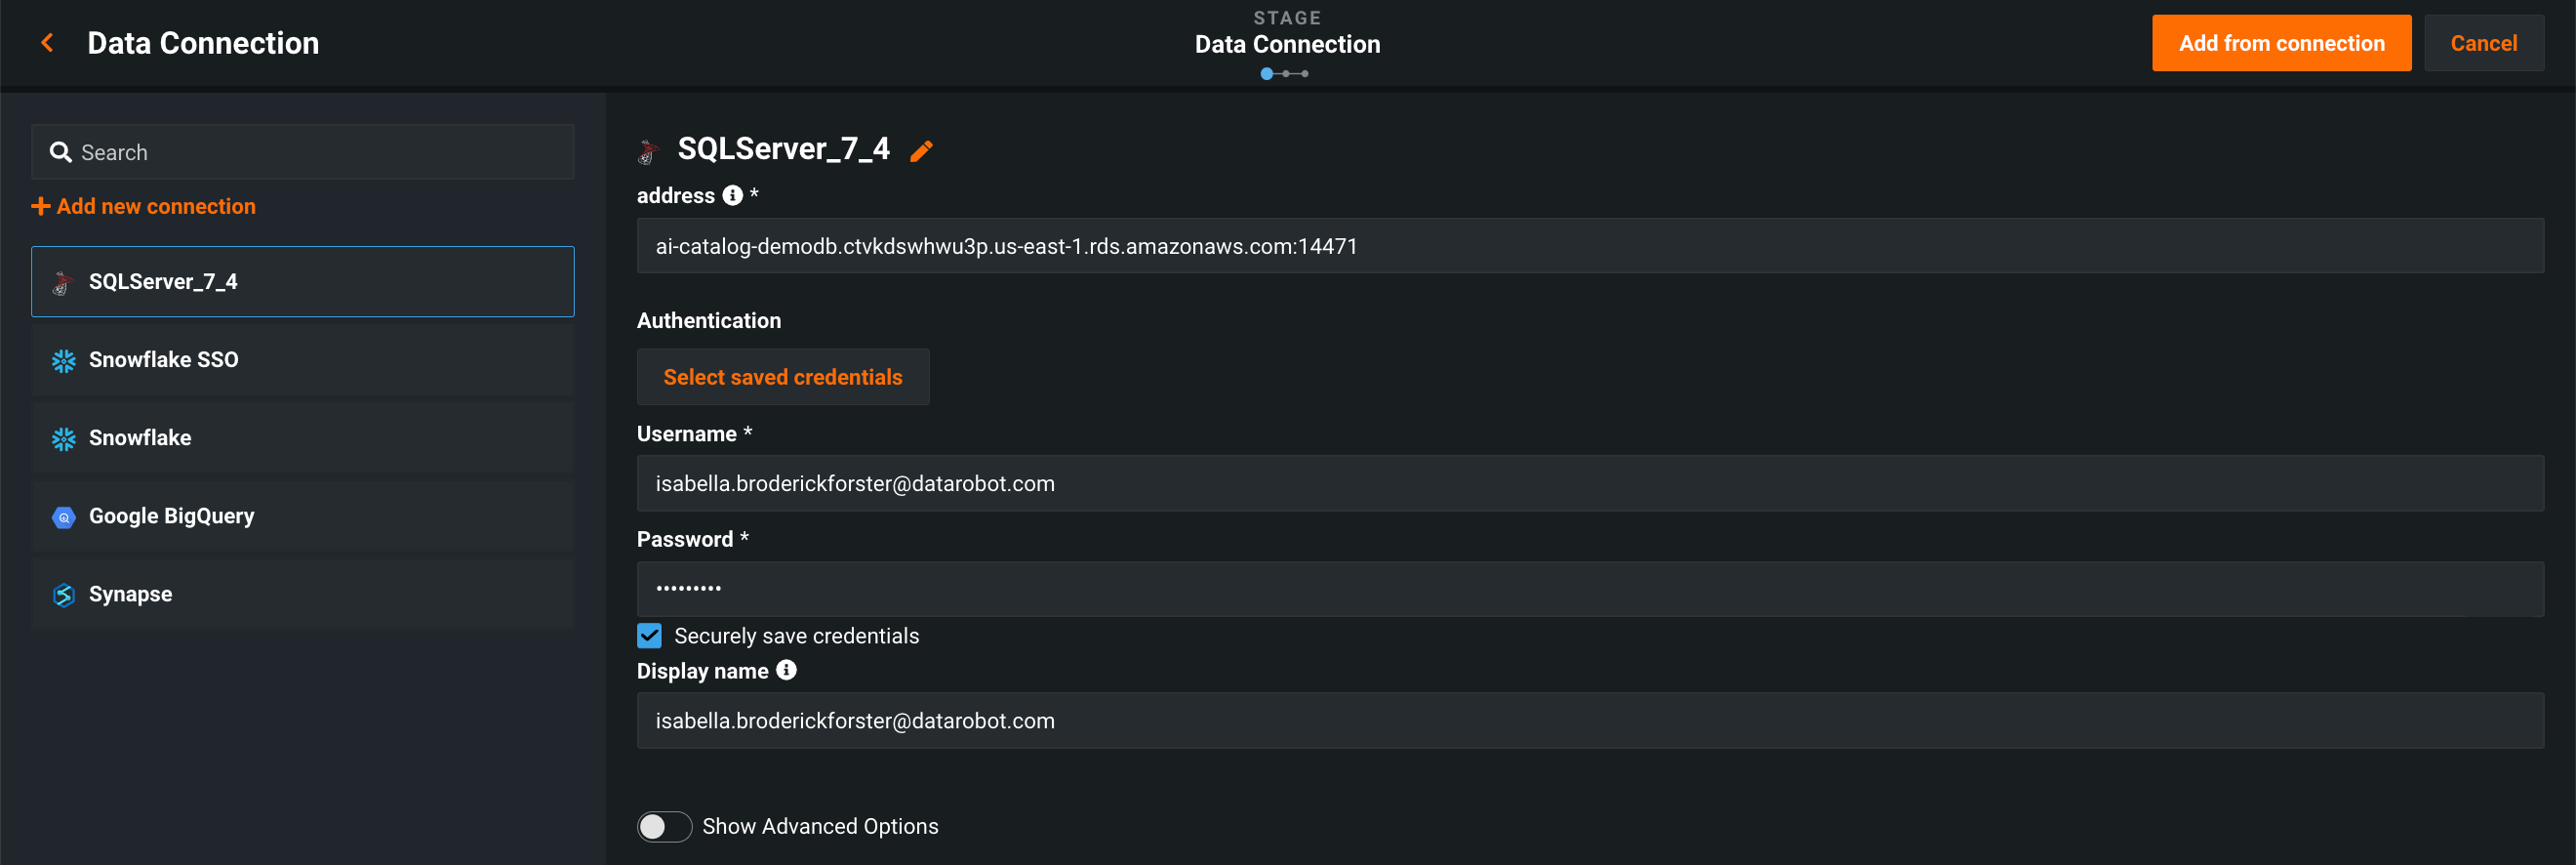
Name the data connection (1), select an authentication method (2), and fill in the required fields (see the documentation for your specific data store).
Note that the visible configuration options are the required parameters for the selected data store, therefore, these options vary for each data store. You can add more parameters under Show advanced options (3).
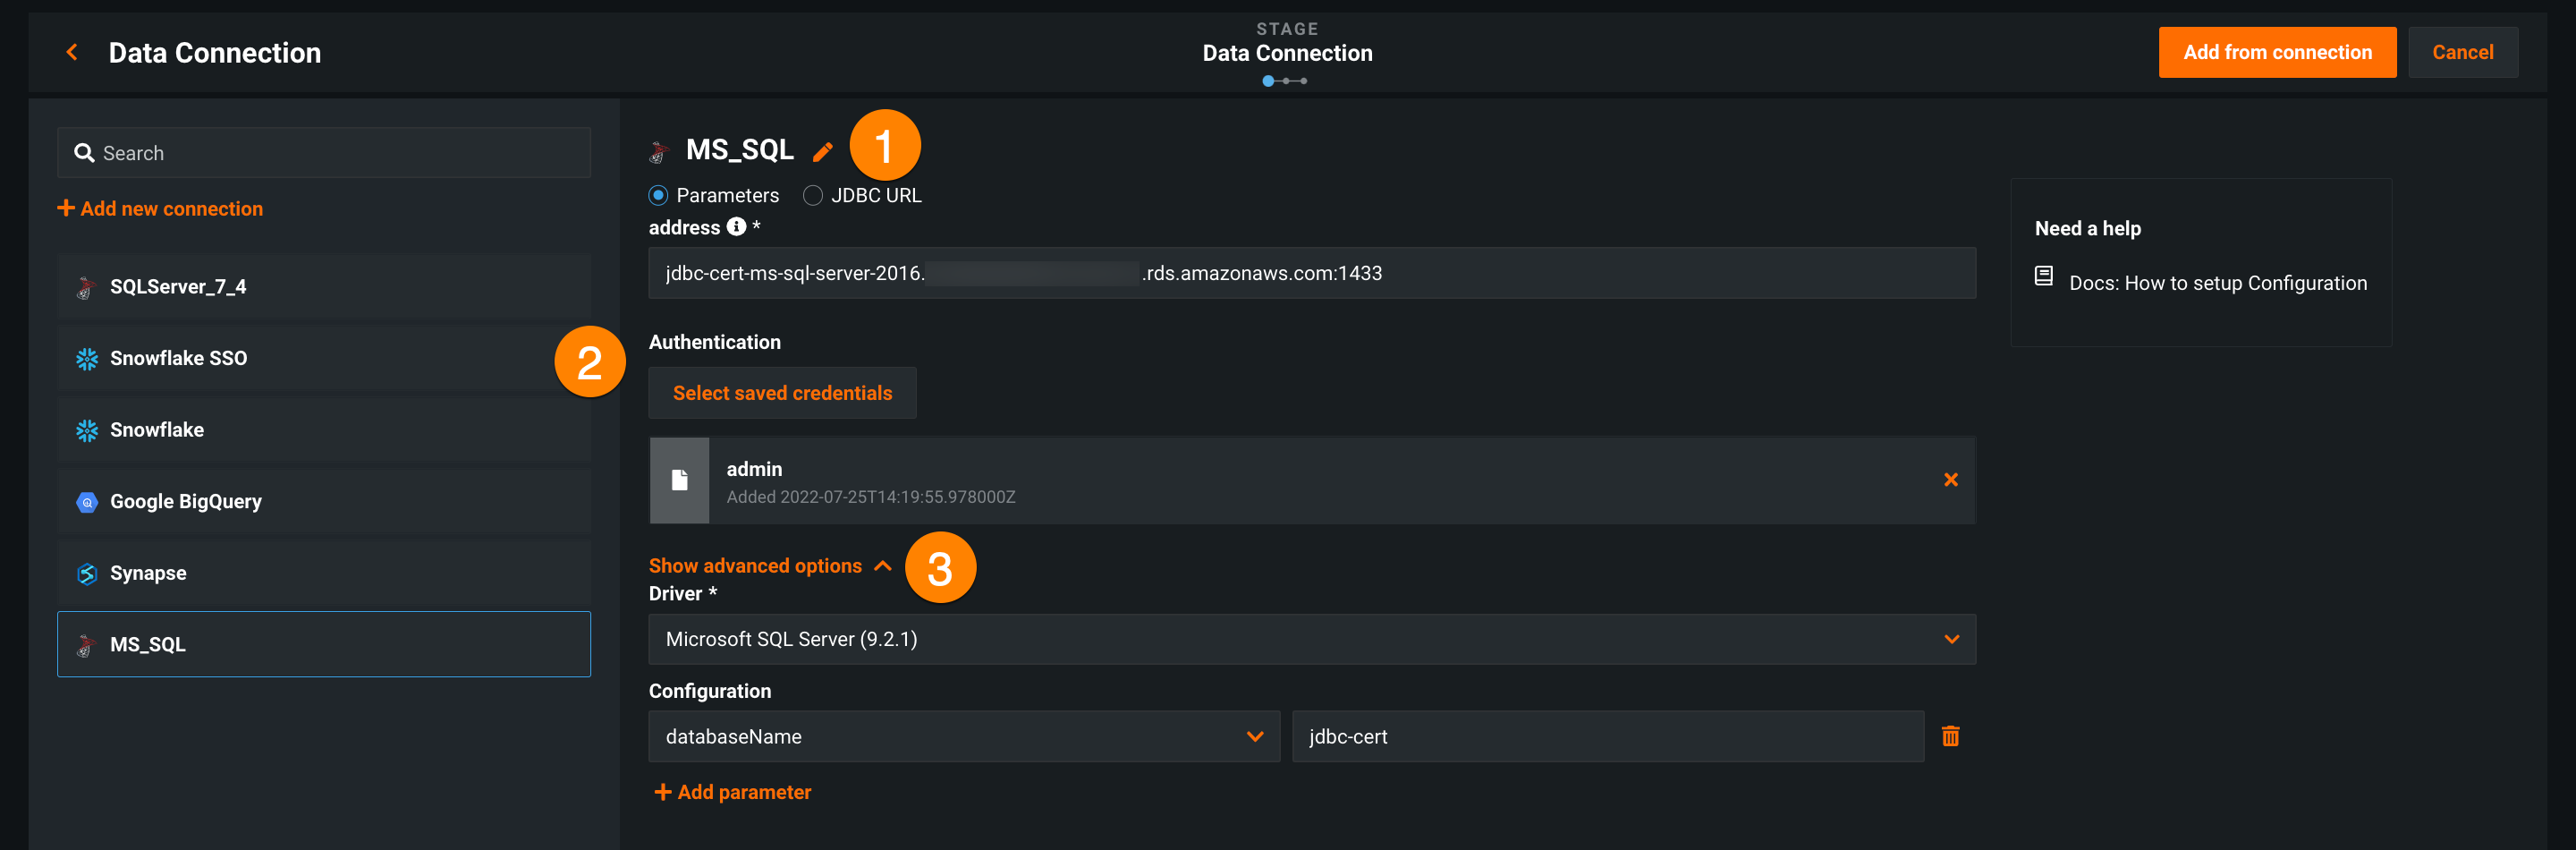
Saved credentials
If you previously added credentials for your datastore via the Credentials Management page, you can click Select saved credentials and choose them from the list instead of adding them manually.
-
Click Add from connection; once selected, the Schema tab opens.
-
The Schema tab lists the available schemas for your database—select a schema from the list. Once selected, the Tables tab opens.
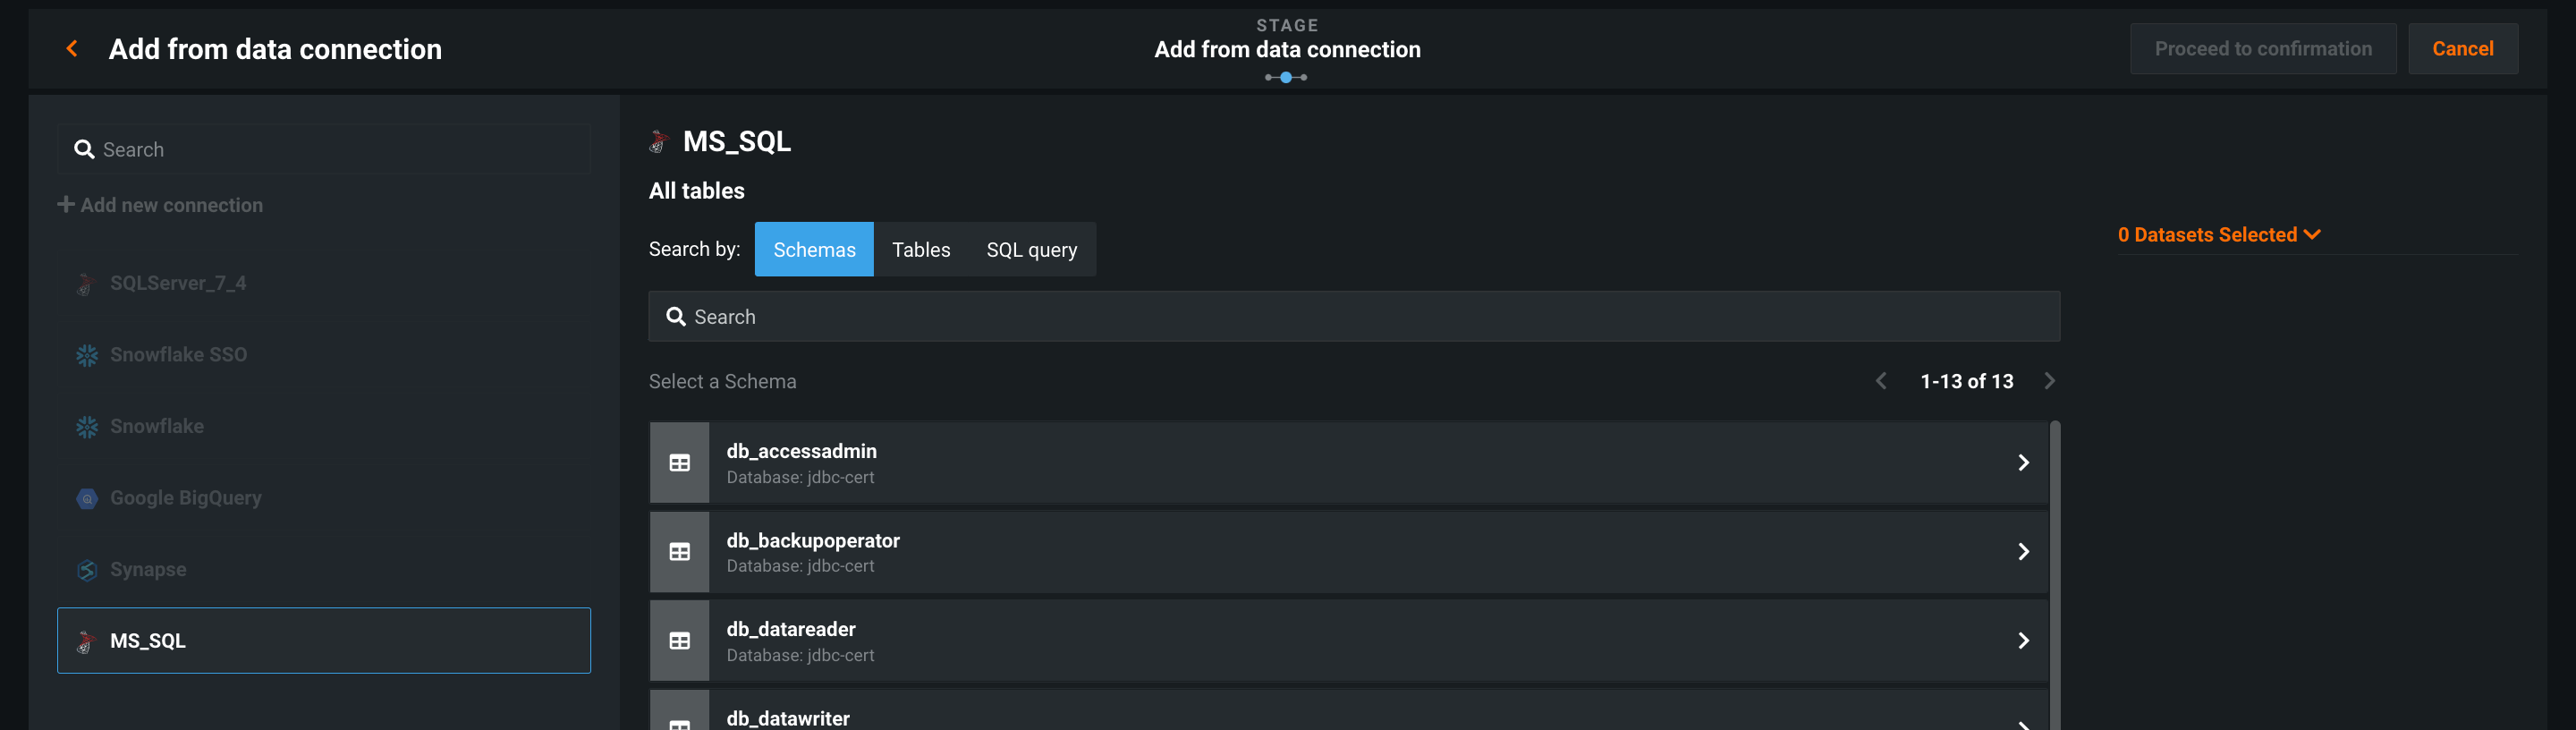
To use a SQL query to select specific elements of the named database, click the SQL query tab.
-
Select the table(s) you want to register in the AI Catalog and click Proceed to confirmation. Each table will be registered as a separate catalog asset.

-
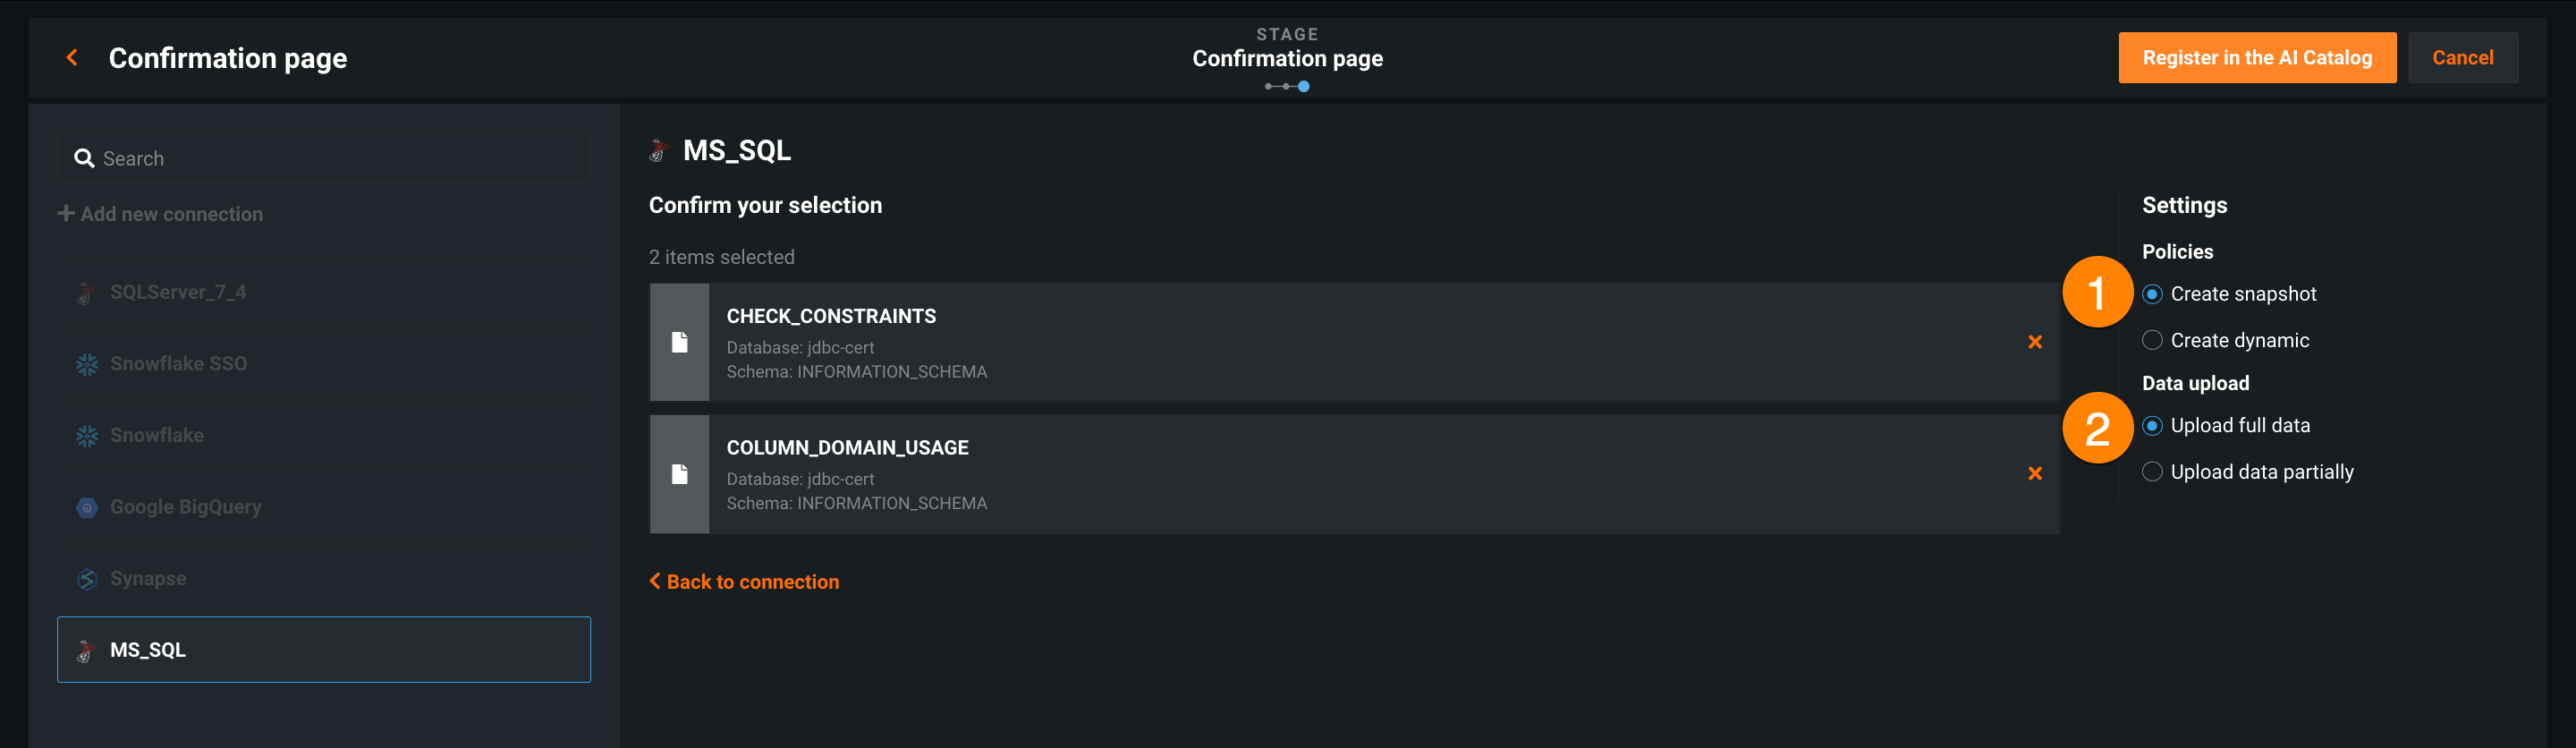
Under Settings, select the appropriate policy (1) and data upload amount (2), then review and confirm your selections by clicking Register in the AI Catalog.
View the existing workflow procedure in the AI Catalog documentation.